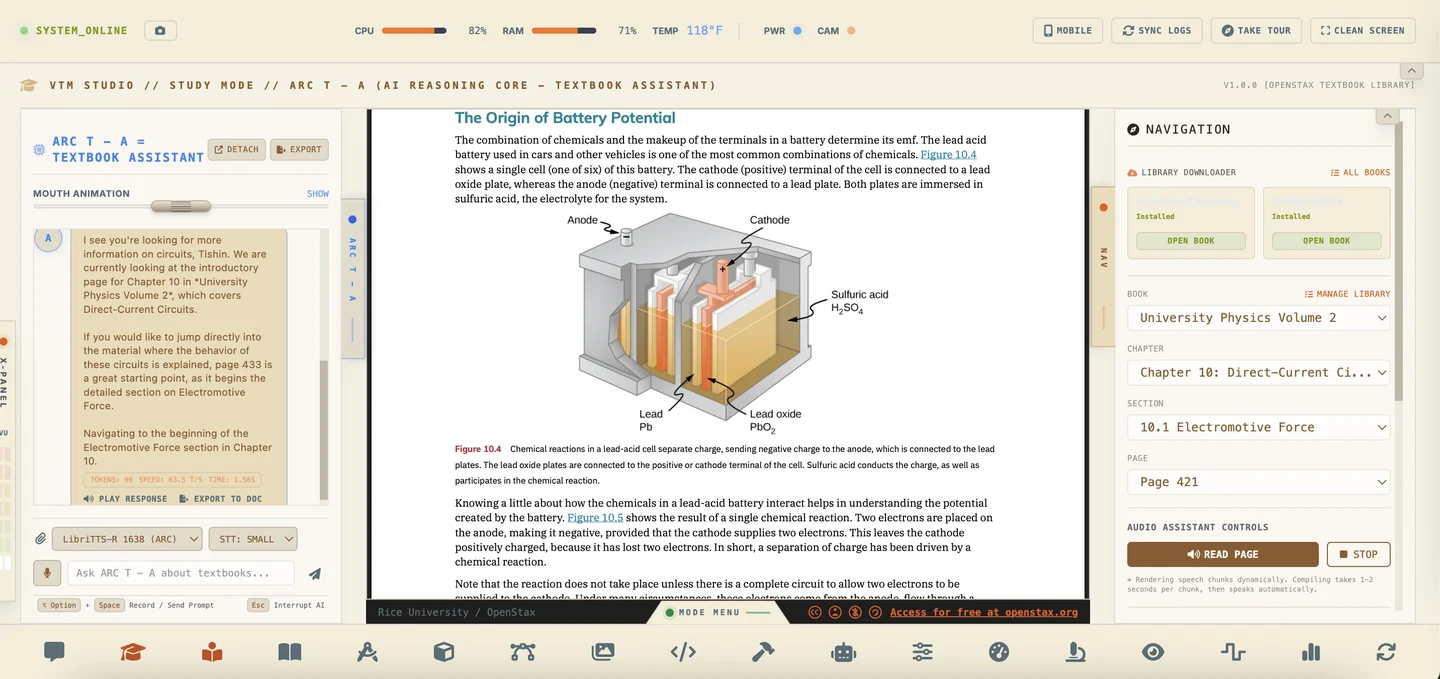
When you build a physical computing project with an Arduino, ESP32, or STM32 board, or a single-board computer like the Raspberry Pi or Arduino UNO Q, every stage of the project tends to live in a different place. You research parts and connections on several websites. You brainstorm with an AI chat in a browser tab. You write code and watch serial data in an IDE. You draw the wiring in one app, edit photos in another, clean up voiceover audio in a third, and keep notes somewhere else. If you want to run your own local AI model, that is yet another tool.
Every time you go from planning a circuit to checking a voltage, writing a sketch, testing a servo, and reading a live sensor, you switch tools. My thinking was simple: why not put it all in one place?
The Studio Idea Is Not New
Creative professionals have worked this way for decades. Microsoft Office first shipped in 1989. In the early 2000s, Macromedia bundled its web tools into Macromedia Studio MX, and Adobe gathered Premiere, After Effects, Audition, and Encore into the Adobe Video Collection. Each one put a full workflow in one package.
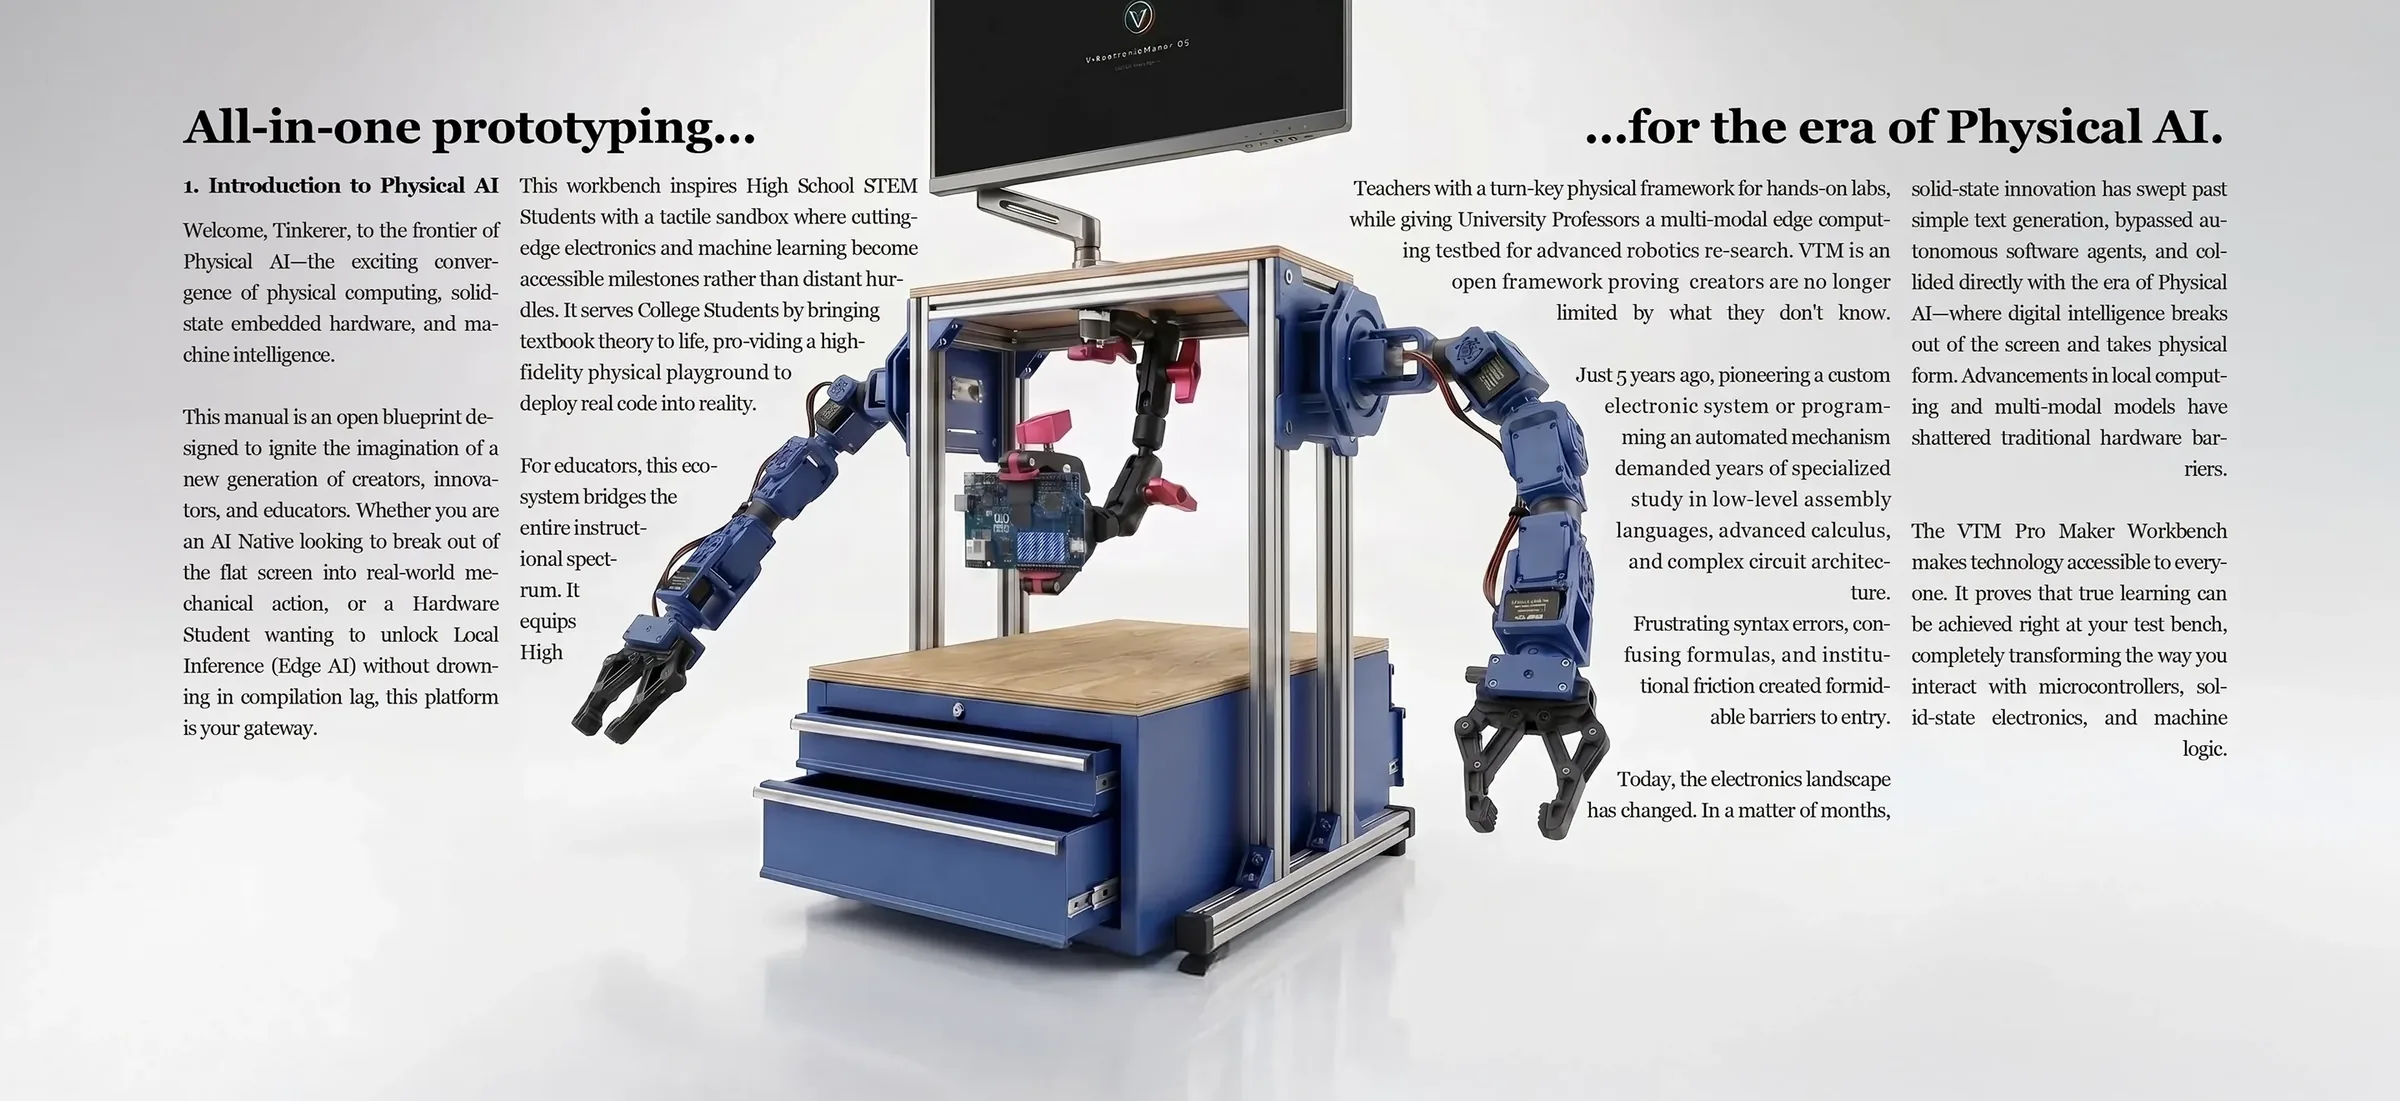
VTM Studio follows that model for makers. It is a single desktop application for physical computing and physical AI prototyping, built around the steps of a project from the first idea to the published build guide.
What VTM Studio Is
VTM Studio (Version 2.2) is a desktop application for macOS, Windows, Linux, Raspberry Pi, and the Arduino UNO Q. In one window, it brings together:
- Cloud AI and local AI: You bring your own free-tier Google Gemini or Groq API key for full reasoning power, and you can also run local models on your own hardware.
- Code editing and board flashing: Monaco-powered editing and direct flashing for Arduino, ESP32, RP2040, and the UNO Q.
- Live sensor telemetry: Microcontroller serial readings rendered as dynamic gauges, readouts, and waveform graphs.
- Robot arm control: USB serial control for 5- and 6-DoF servo arms with custom protocol support.
- Computer vision: Object detection and color tracking with bounding boxes and HSV locks.
- Circuit layout drawing: Vector breadboard layout, parts specs, and engineering reference guides.
- University textbooks: OpenStax™ textbooks read alongside an AI teaching assistant.
- Local model conversion and quantization: Safetensors-to-GGUF conversion so you can build your own model files.
- Documentation tools: Dedicated modules for photos, audio mastering, and rich-text build logs.
Here is how VTM Studio came about, how you use it to build real hardware, and which pack fits your projects.
Why VTM Studio Exists: From a Broadcast Suite to Two Ruined Soldering Irons
I don't have a degree in computer science or electrical engineering. My degree is a Bachelor of Arts in Film and Video Production, and VTM Studio is designed from a maker's and a video producer's point of view.
For nearly thirty years I worked in broadcast television and video production. I shot breaking news from field trucks in New York and California, cut daily packages on Betacam decks, and worked inside a $500,000 online editing suite: a Grass Valley switcher, DPM-100 digital picture manipulators, a Mackie mixer, a patch bay, and thick bundles of cable running under the raised floor to equipment racks in a cold master control room. Along the way I designed motion graphics, then websites, and learned to write, produce, and direct, eventually becoming a creative director. That is the mindset I brought to VTM Studio.
In television, though, the broadcast engineers fixed the hardware and soldered the cables. I never touched that side of the building. That changed in 2018, when I snapped the 3.5mm jack off a pair of expensive Sony headphones.
After they sat in a drawer for a year, I decided to learn to solder just to fix that cable. I bought a four-dollar soldering iron at Harbor Freight and ruined the tip right away because I didn't know how to tin it. I bought a second one and ruined that too. Finally I got a temperature-controlled Weller station and made a clean joint. When I told an engineer at work, he suggested I look into Arduino and Raspberry Pi.
Building a Lab, Then Losing It
Between 2019 and 2021, I placed more than eighty orders and built a full maker workspace from scratch. It started with an Asus Tinker Board S, a Raspberry Pi 3, and Elegoo and Keyestudio Arduino starter kits. Then came Mega 2560s, Nanos, 37-in-1 sensor kits, I2C LCD screens, DS3231 real-time clocks, an optical fingerprint reader, a 12V solenoid lock, PCA9685 servo drivers, stepper motors, a Creality Ender 3 Pro with stacks of PLA and TPU filament, and a Panasonic Lumix G7 4K camera kit to film it all.
I worked through breadboard projects and shields, and built my first real prototype: an old 350W ATX computer power supply turned into a wood-and-acrylic desktop power supply with dual LED voltage and current displays. I combined my video background with electronics and shared it all on YouTube and my website under one message: Learn with me as I learn.
Then hard personal circumstances cost me that entire lab: my computers, my 3D printer, my camera gear, my Arduinos, and every bin of parts. That setup had taken more than two years and over $3,000 to build. Starting over from zero, I couldn't just reorder eighty packages of hardware.
What AI Changed
When AI arrived, I realized I could build in a completely different way. A multimeter isn't expensive to buy, but building your own is fun. AI could write the code and give you the breadboard wiring, and with a single Arduino Nano, a few jumper wires, and a resistor, you had a decent meter. You weren't just a consumer anymore; you were a maker. AI also put a real robot within reach, and I started thinking seriously about what I would build into one, now that I actually could.
Taking Only What I Needed
When I published tutorials on VideotronicMaker.com, the Arduino Project Hub, and Hackster.io, I leaned on some excellent programs: the Arduino IDE, Fritzing, XOD, Visual Studio, and Photoshop. I'm grateful for every one of them. What I wanted was to take the specific pieces I used most and put them side by side.
I didn't need a full photo-editing suite, just a pen tool to cut out a picture of a Nano. I didn't want to draw a custom SVG for a part that wasn't in a library; I just needed a clean way to show the wiring. And I didn't need a full professional IDE, just enough to write a sketch and flash a board. Working with AI coding agents, I found I could build exactly that: a studio laid out in the same order you make a project from scratch.
How You Use VTM Studio: The Maker Workflow, Step by Step
Whether you are building an environmental sensor node, a biometric lock, or a robot arm, most physical computing projects follow the same path: figure out what you need, wire it, code it, prove it works, then share it. VTM Studio arranges its modes in that same order, so the next tool you need sits right next to the last one you used.
Plan the Build and Learn What You Need
Chat Mode — ARC and VAS-X
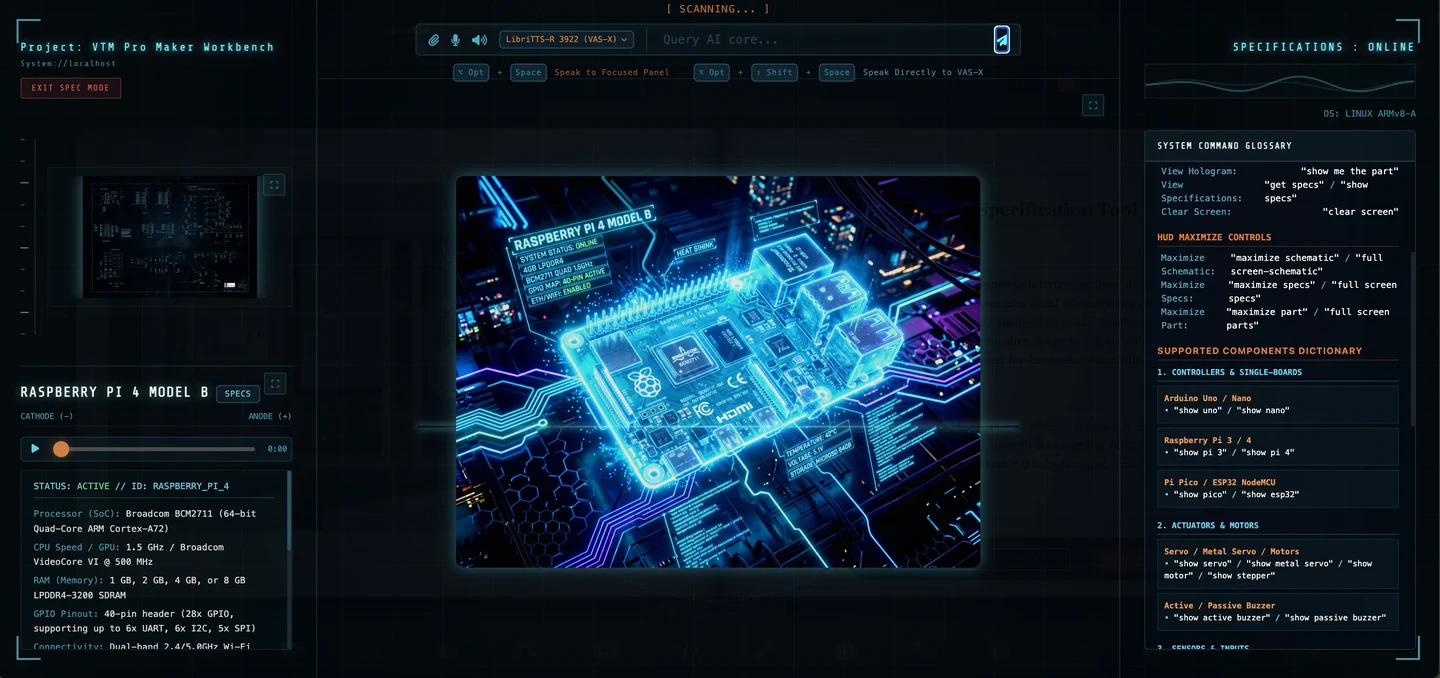
Tier 1 · Maker PackWhy you use it: to turn a rough idea into a parts list, a wiring plan, and starter code. ARC is the main engineering chat. Ask it to work through a circuit, size a power supply, or write a sketch, and it can send the generated code straight into Code Mode. VAS-X sits in the left sidebar. It knows which mode you are in and can switch modes, open tabs, and change Vision Mode settings for you. You bring your own free-tier API keys from Google AI Studio or Groq. (Offline local models are part of the Physical AI Pro Pack.)
Study Mode — with ARC T-A
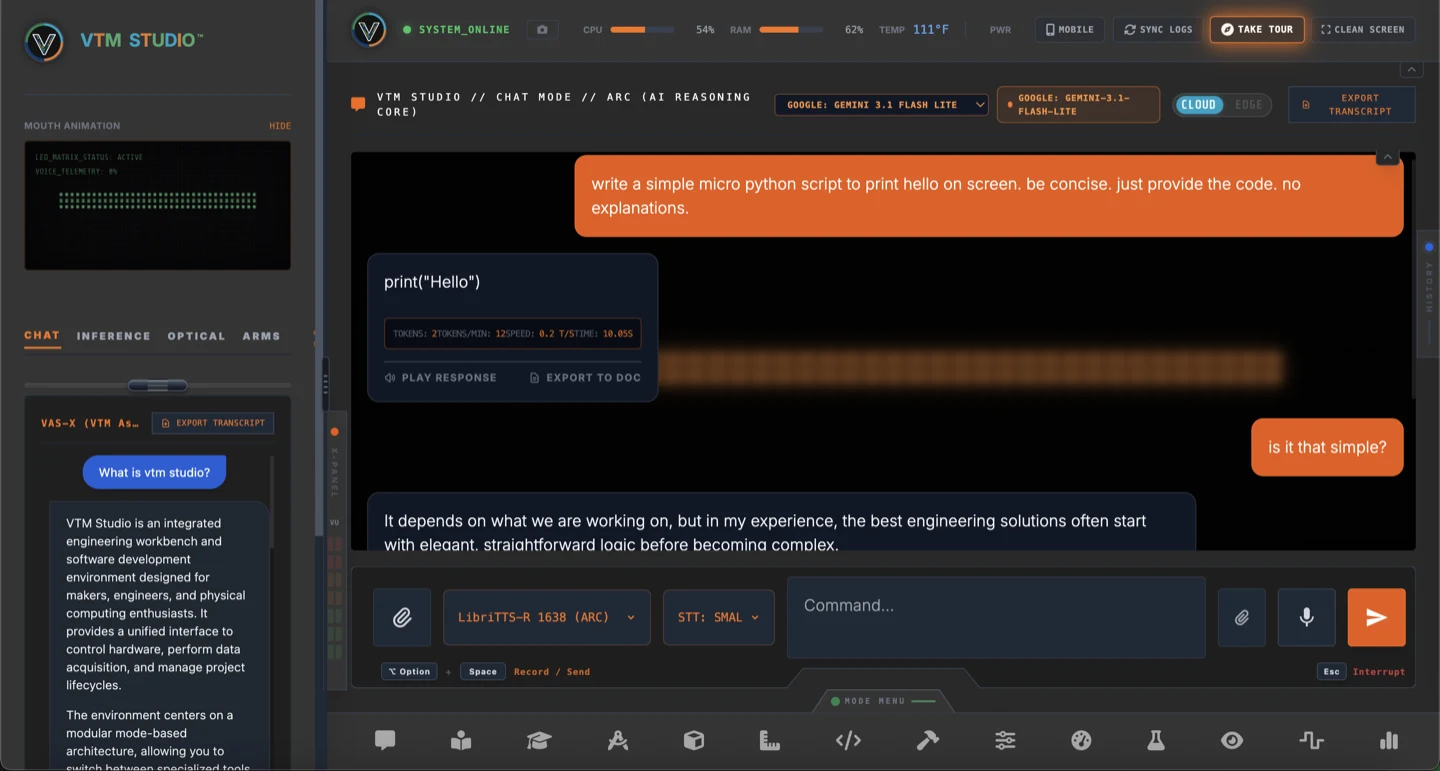
Tier 2 · Maker Pro PackWhy you use it: when you need to actually understand the physics or electronics, not just get an answer. Study Mode downloads open-licensed OpenStax™ university textbooks on demand into your own storage and shows them next to ARC T-A, a teaching assistant that reads the page you are on. Ask it to explain a concept from that page, or have it read the section aloud sentence by sentence.
Spec Mode
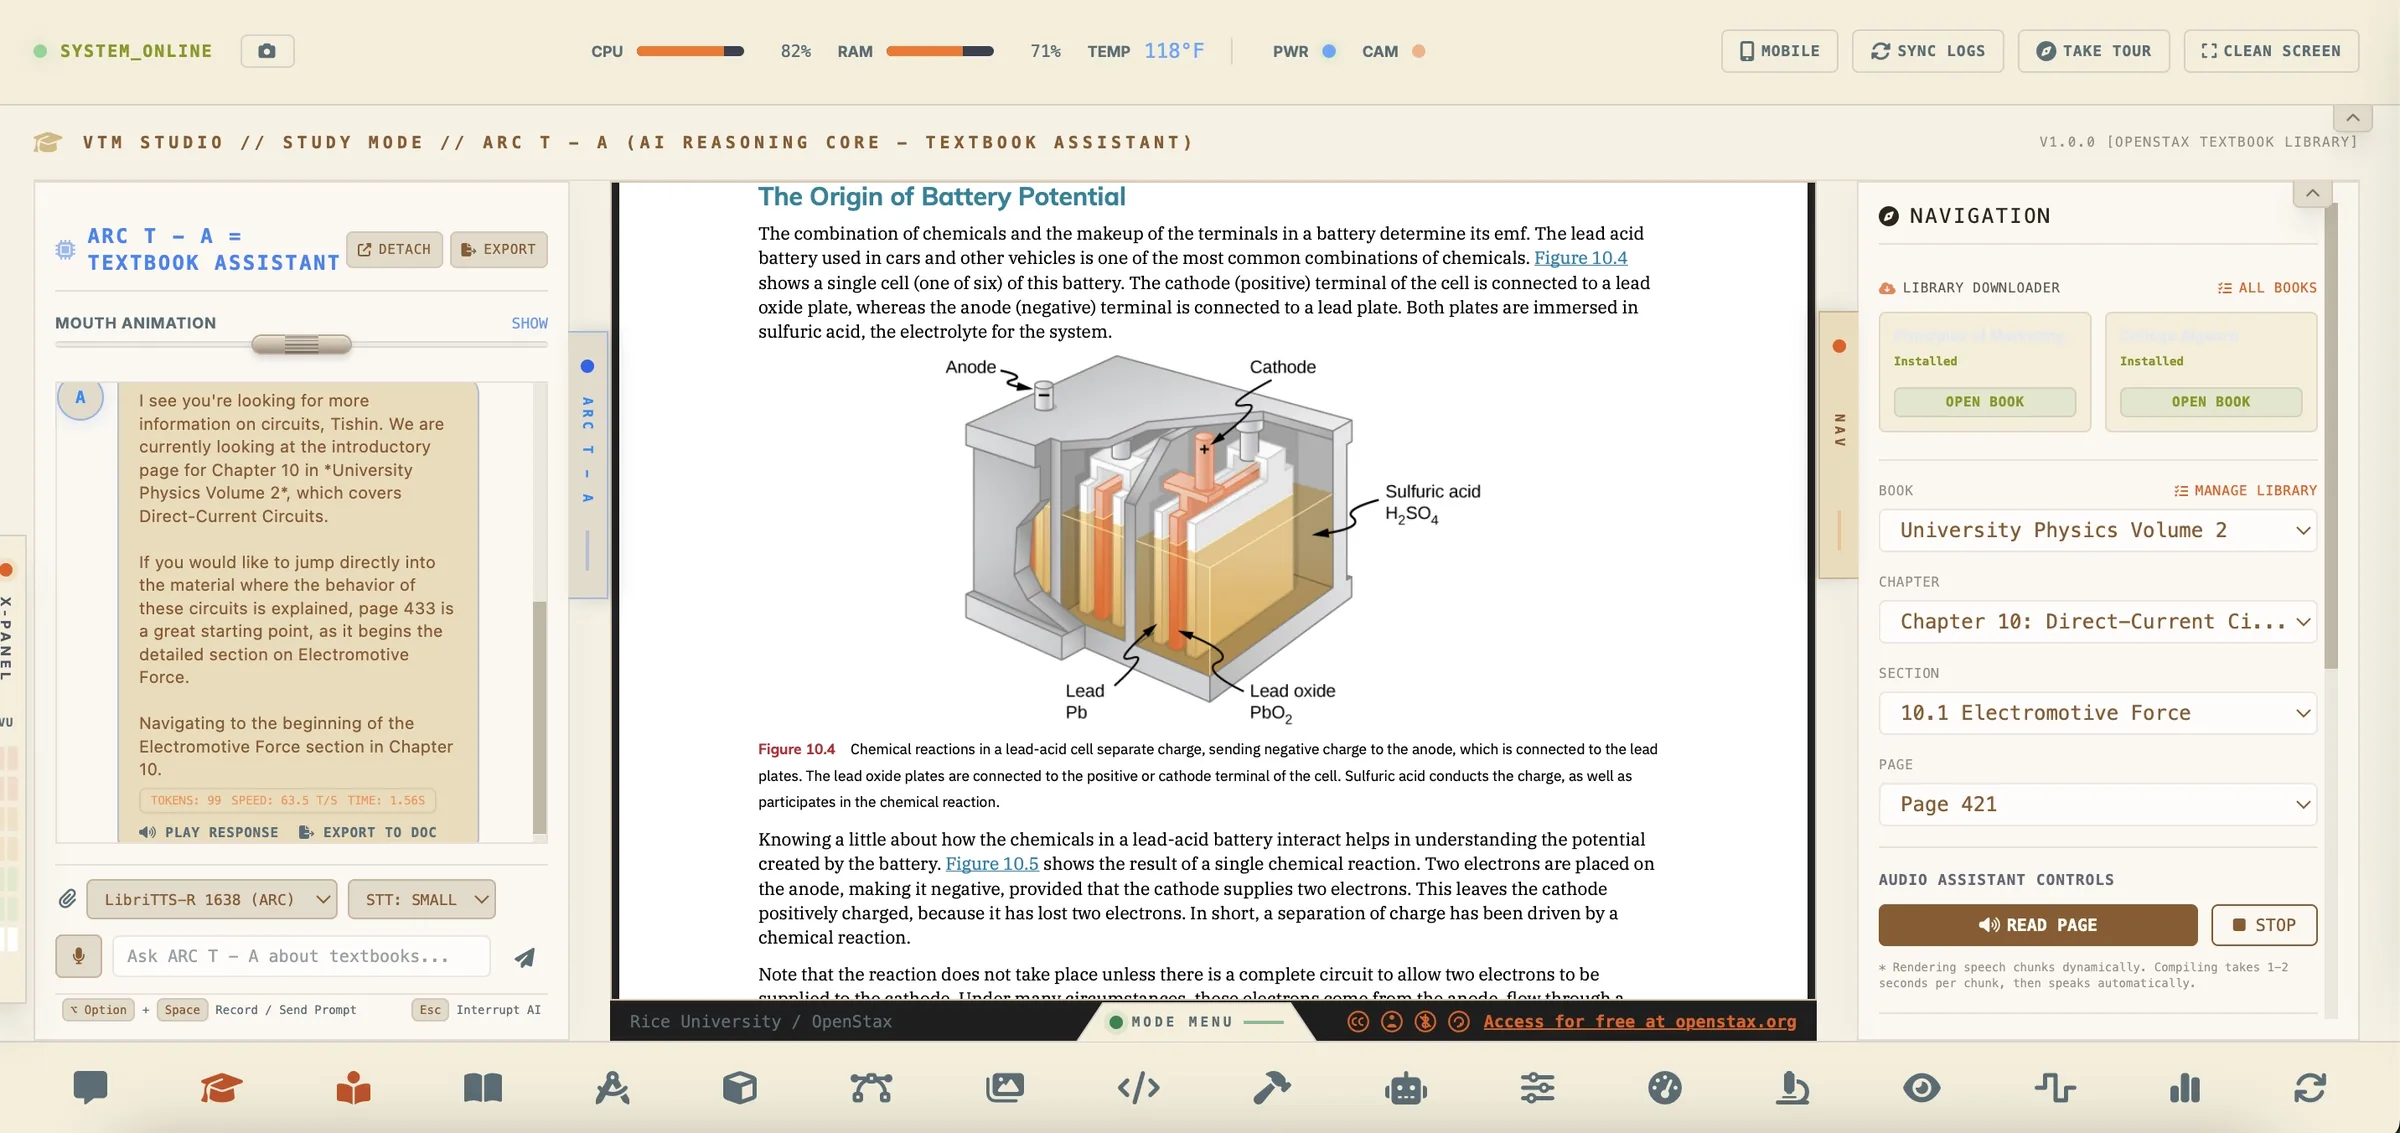
Tier 1 · Maker PackWhy you use it: to keep the exact wiring connections, voltages, and dimensions of your parts on screen while you wire. Each part gets a spec sheet with 3D visualizations, datasheets, and fullscreen schematics, plus a click-to-copy command glossary. You can edit the specs to match the variant you actually bought, and voice lookup lets you pull up a part without leaving the breadboard.
Reference Mode
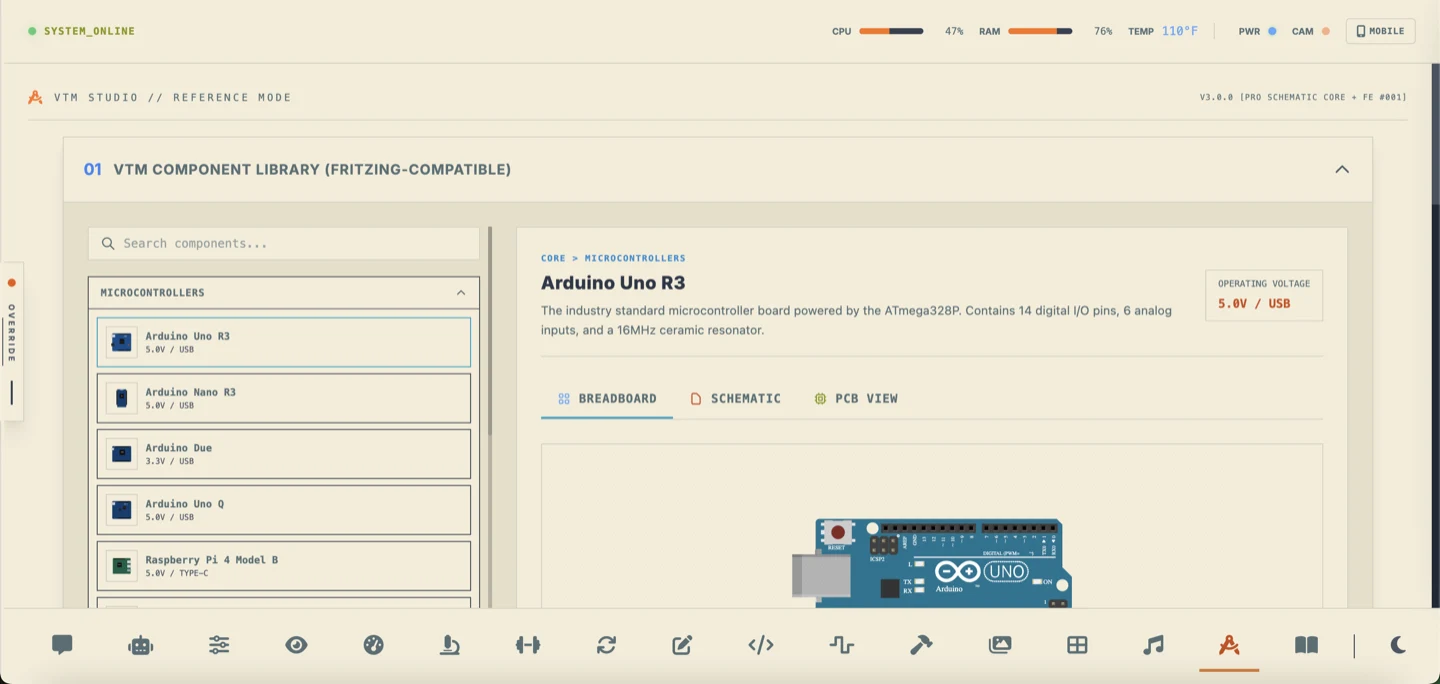
Tier 1 · Maker PackWhy you use it: for the quick lookups that interrupt every build. It has twelve tools in one place: a component library, schematics viewer, resistor and capacitor guides, calculators and unit conversions, AWG wire gauges, screw and unit references, board outlines, 3D printing references, processor architectures, and a maker dictionary.
Write the Code, Flash the Board, Prove It Works
Code Mode
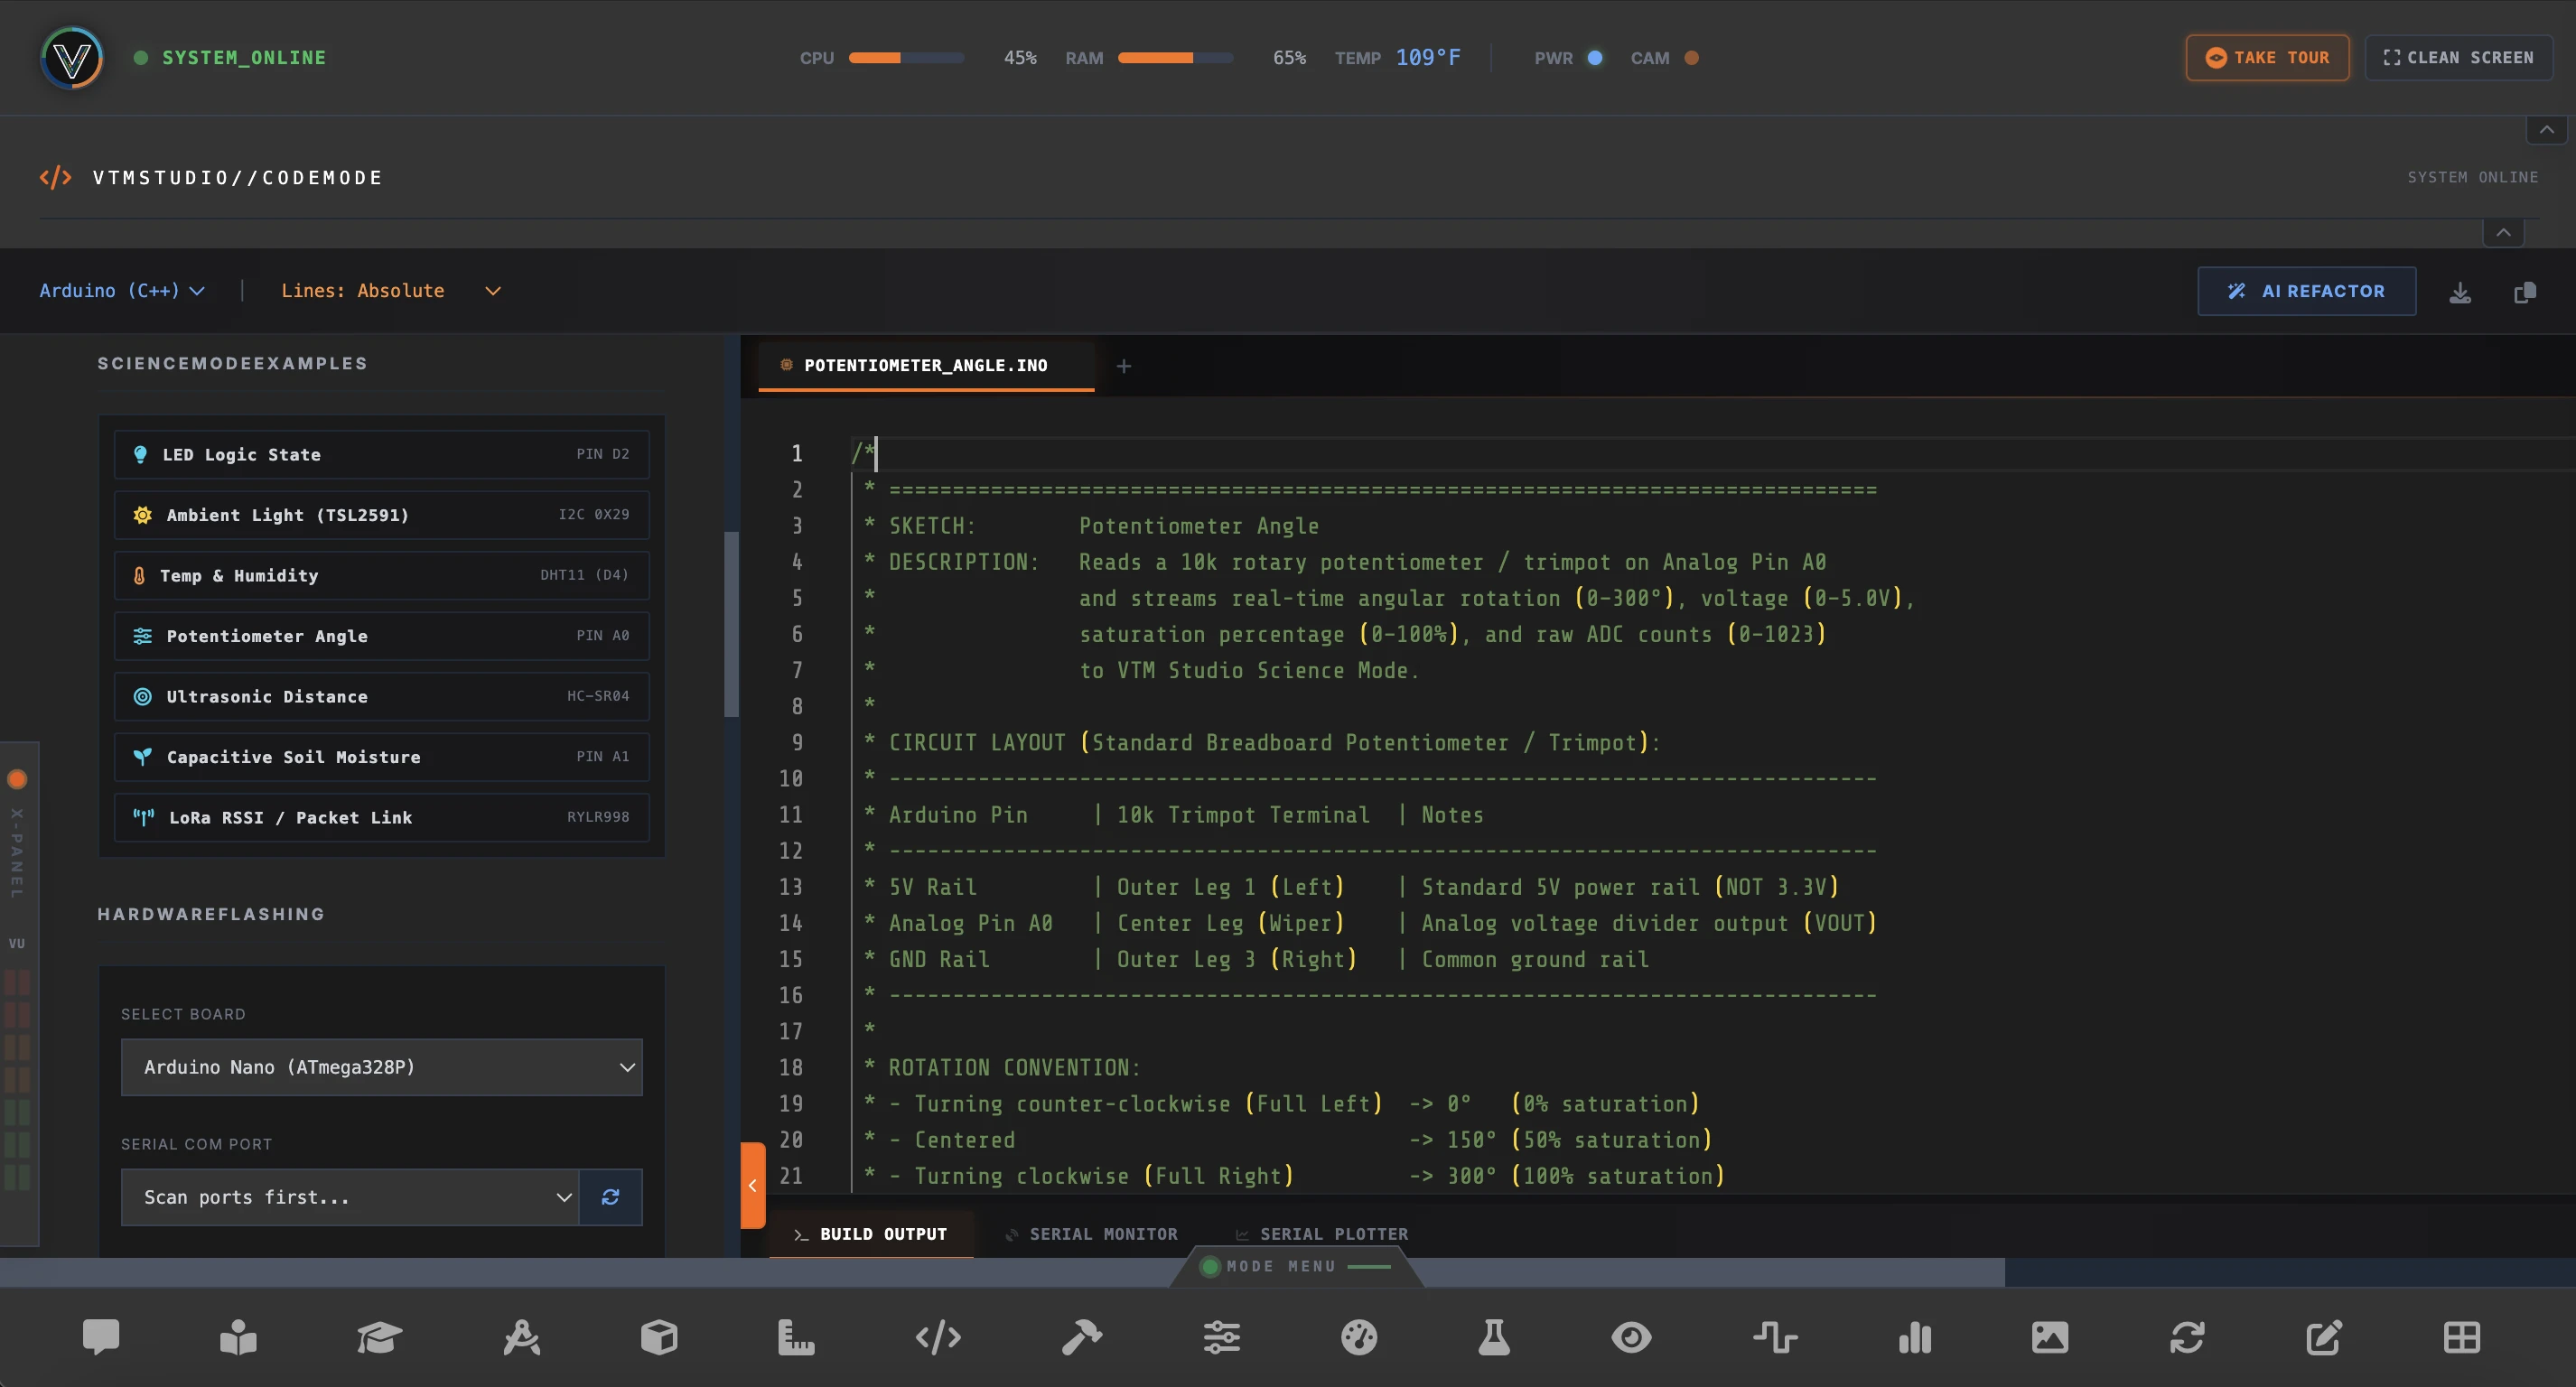
Tier 1 · Maker PackWhy you use it: to go from sketch to running hardware in one window. Write Arduino C++ in a Monaco editor with multi-file tabs, then compile and flash to Arduino AVR boards, UNO R4, Nano 33, Arduino UNO Q, ESP32/ESP8266, or RP2040 Pico. The built-in serial monitor and waveform plotter show the result right away. The example drawer holds tested sketches that match Science Mode panels one-to-one, so you can flash an example and watch the data show up. Attach your circuit diagram image to the project so the code and wiring stay together.
Science Mode
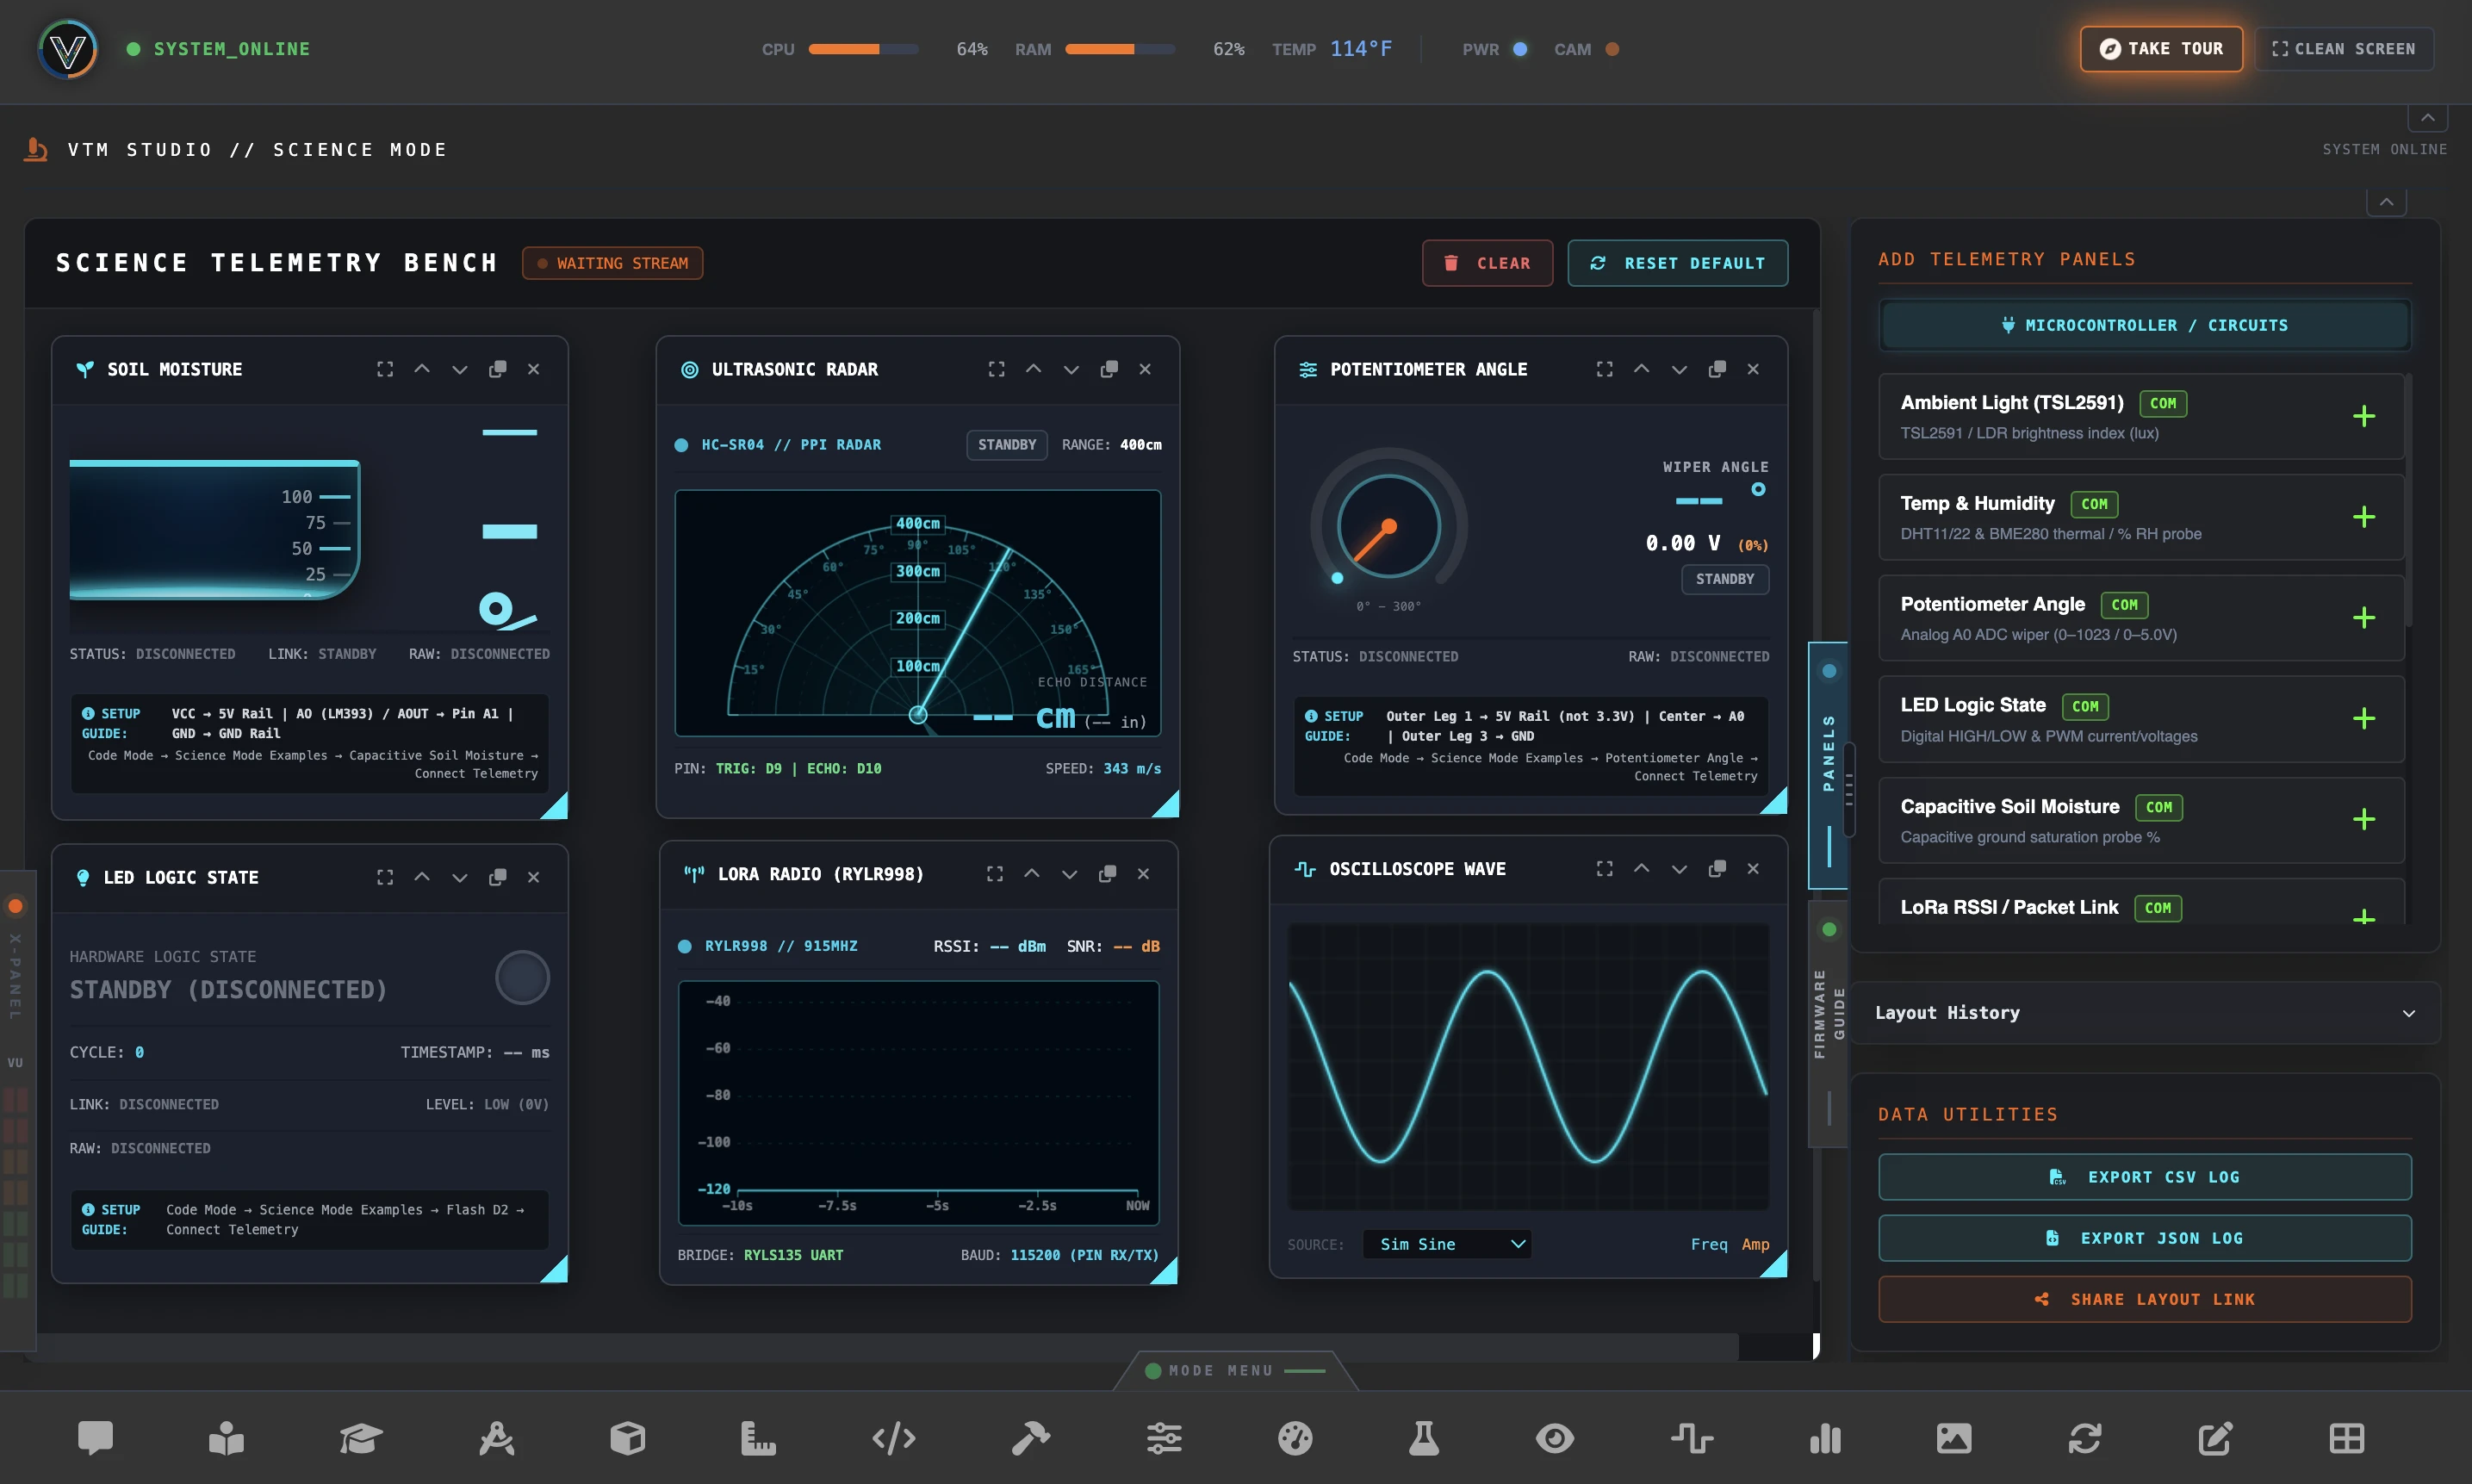
Tier 2 · Maker Pro PackWhy you use it: to see what your sensor is doing, not just read numbers scrolling past. Science Mode turns live serial data from your microcontroller into gauges, readouts, and real-time graphs, and keeps the raw line visible so you can check the parsing. It also reads smartphone sensors, so you can compare a phone light reading with your own sensor. Export the session to CSV or JSON for your notes. If you teach or make tutorials, putting this panel on screen shows your audience the circuit working in real time.
Meter Mode
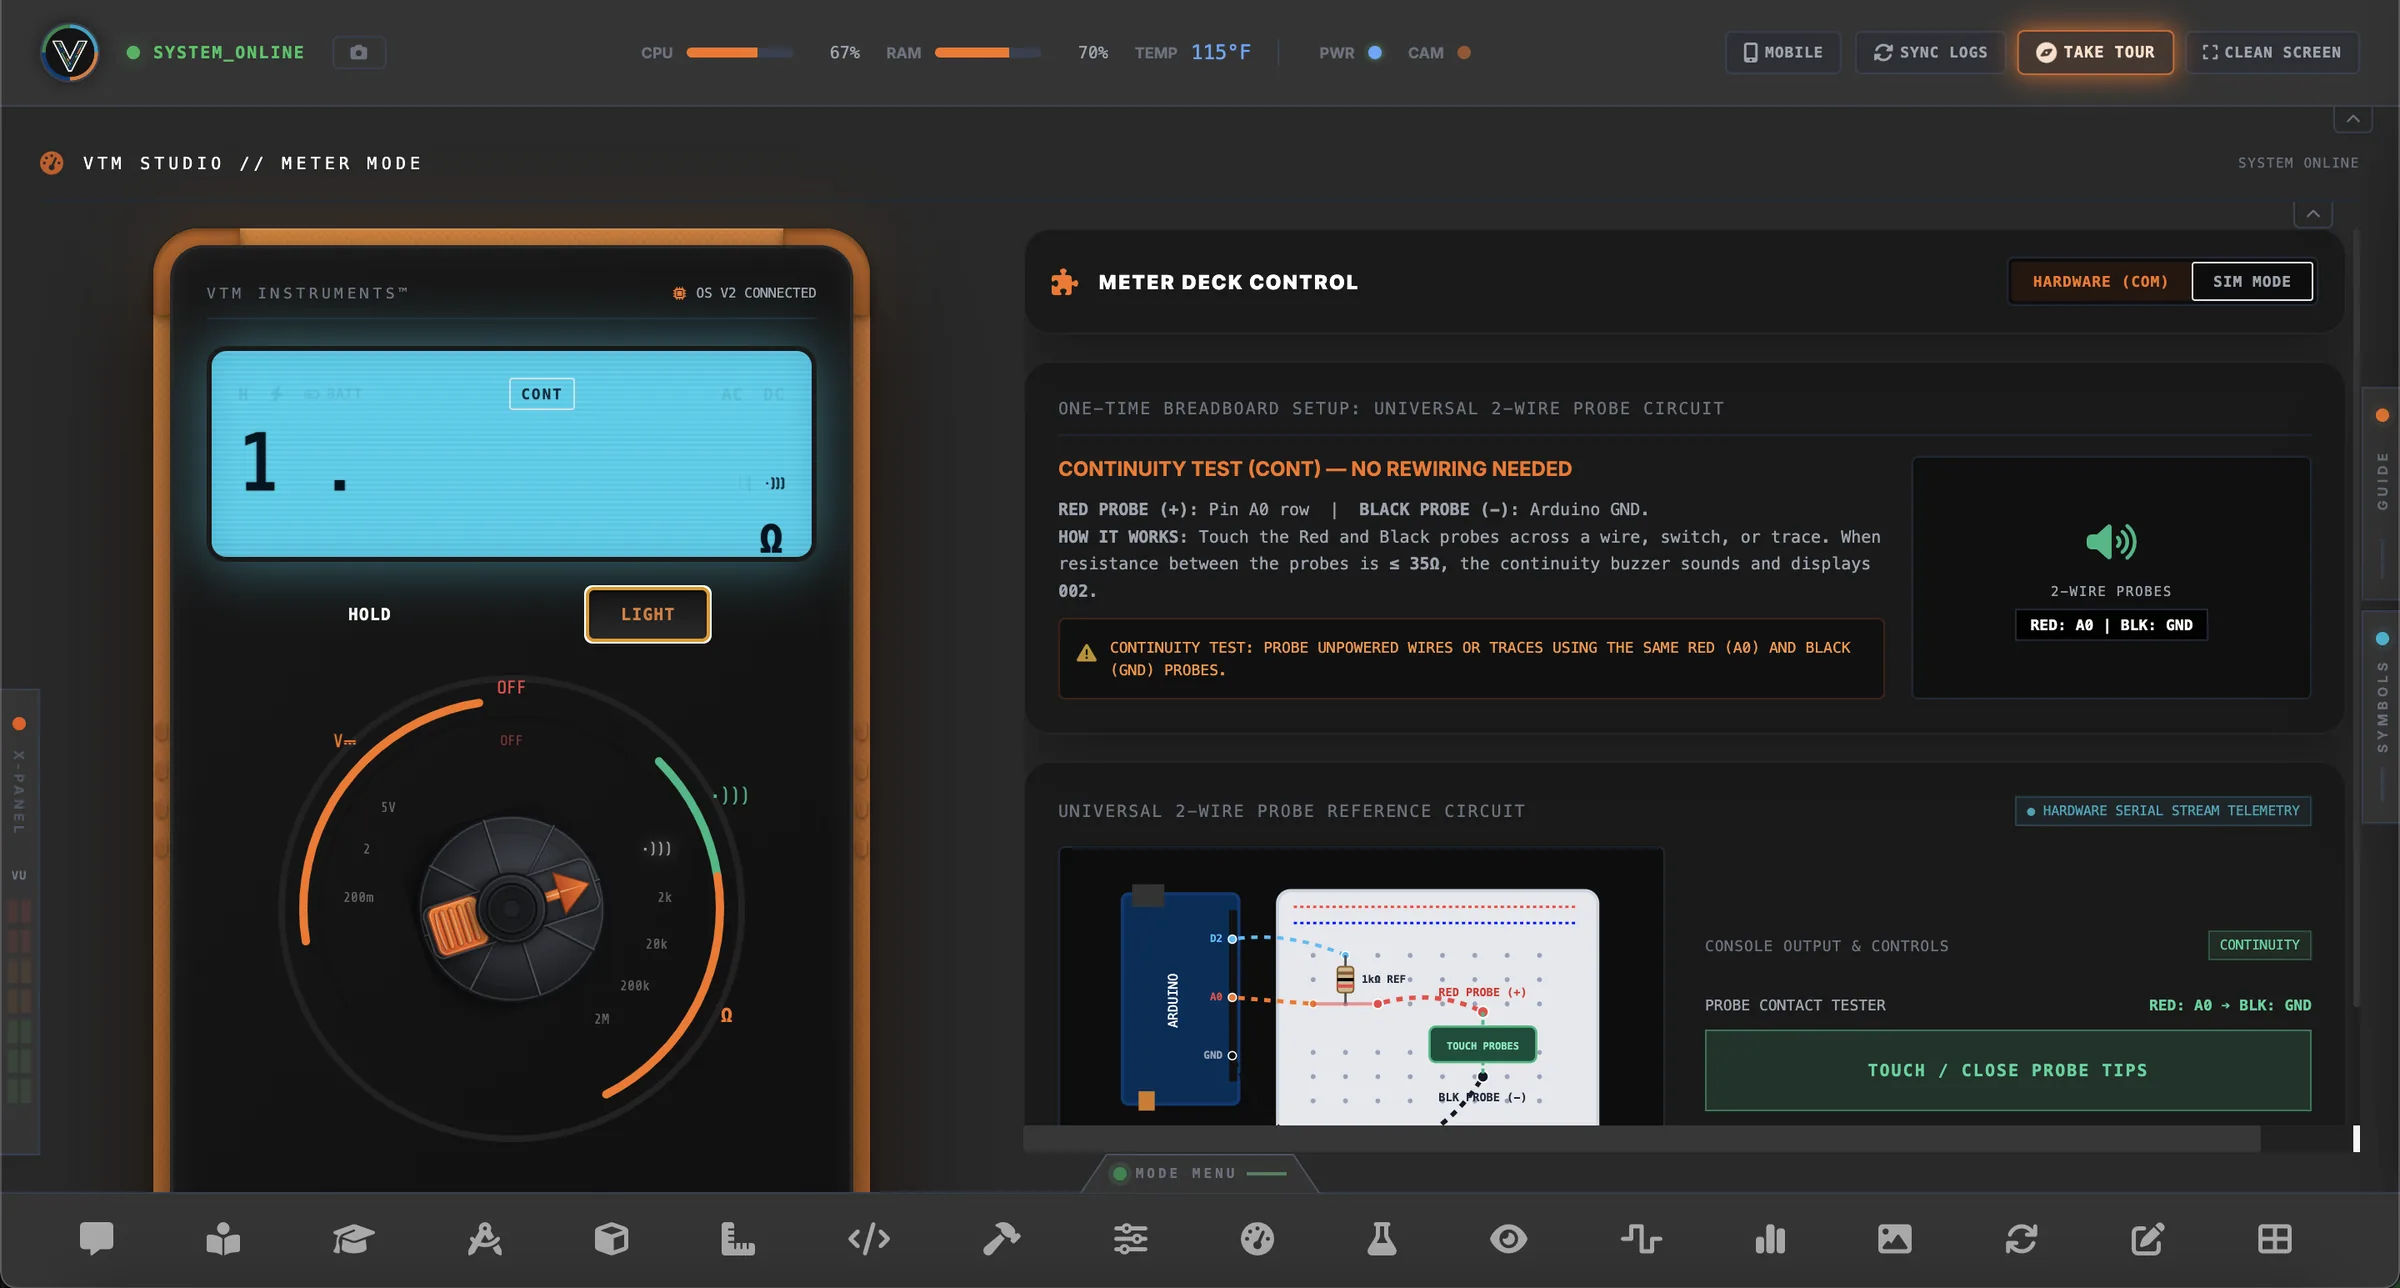
Tier 2 · Maker Pro PackWhy you use it: to check voltage, current, and resistance on the breadboard with a readable display. Flash the included meter sketch and your readings appear on a multimeter-style LCD with rotary dials. It is a clean way to confirm low-voltage DC values during prototyping.
Build Machines That Move and See
Arm Mode
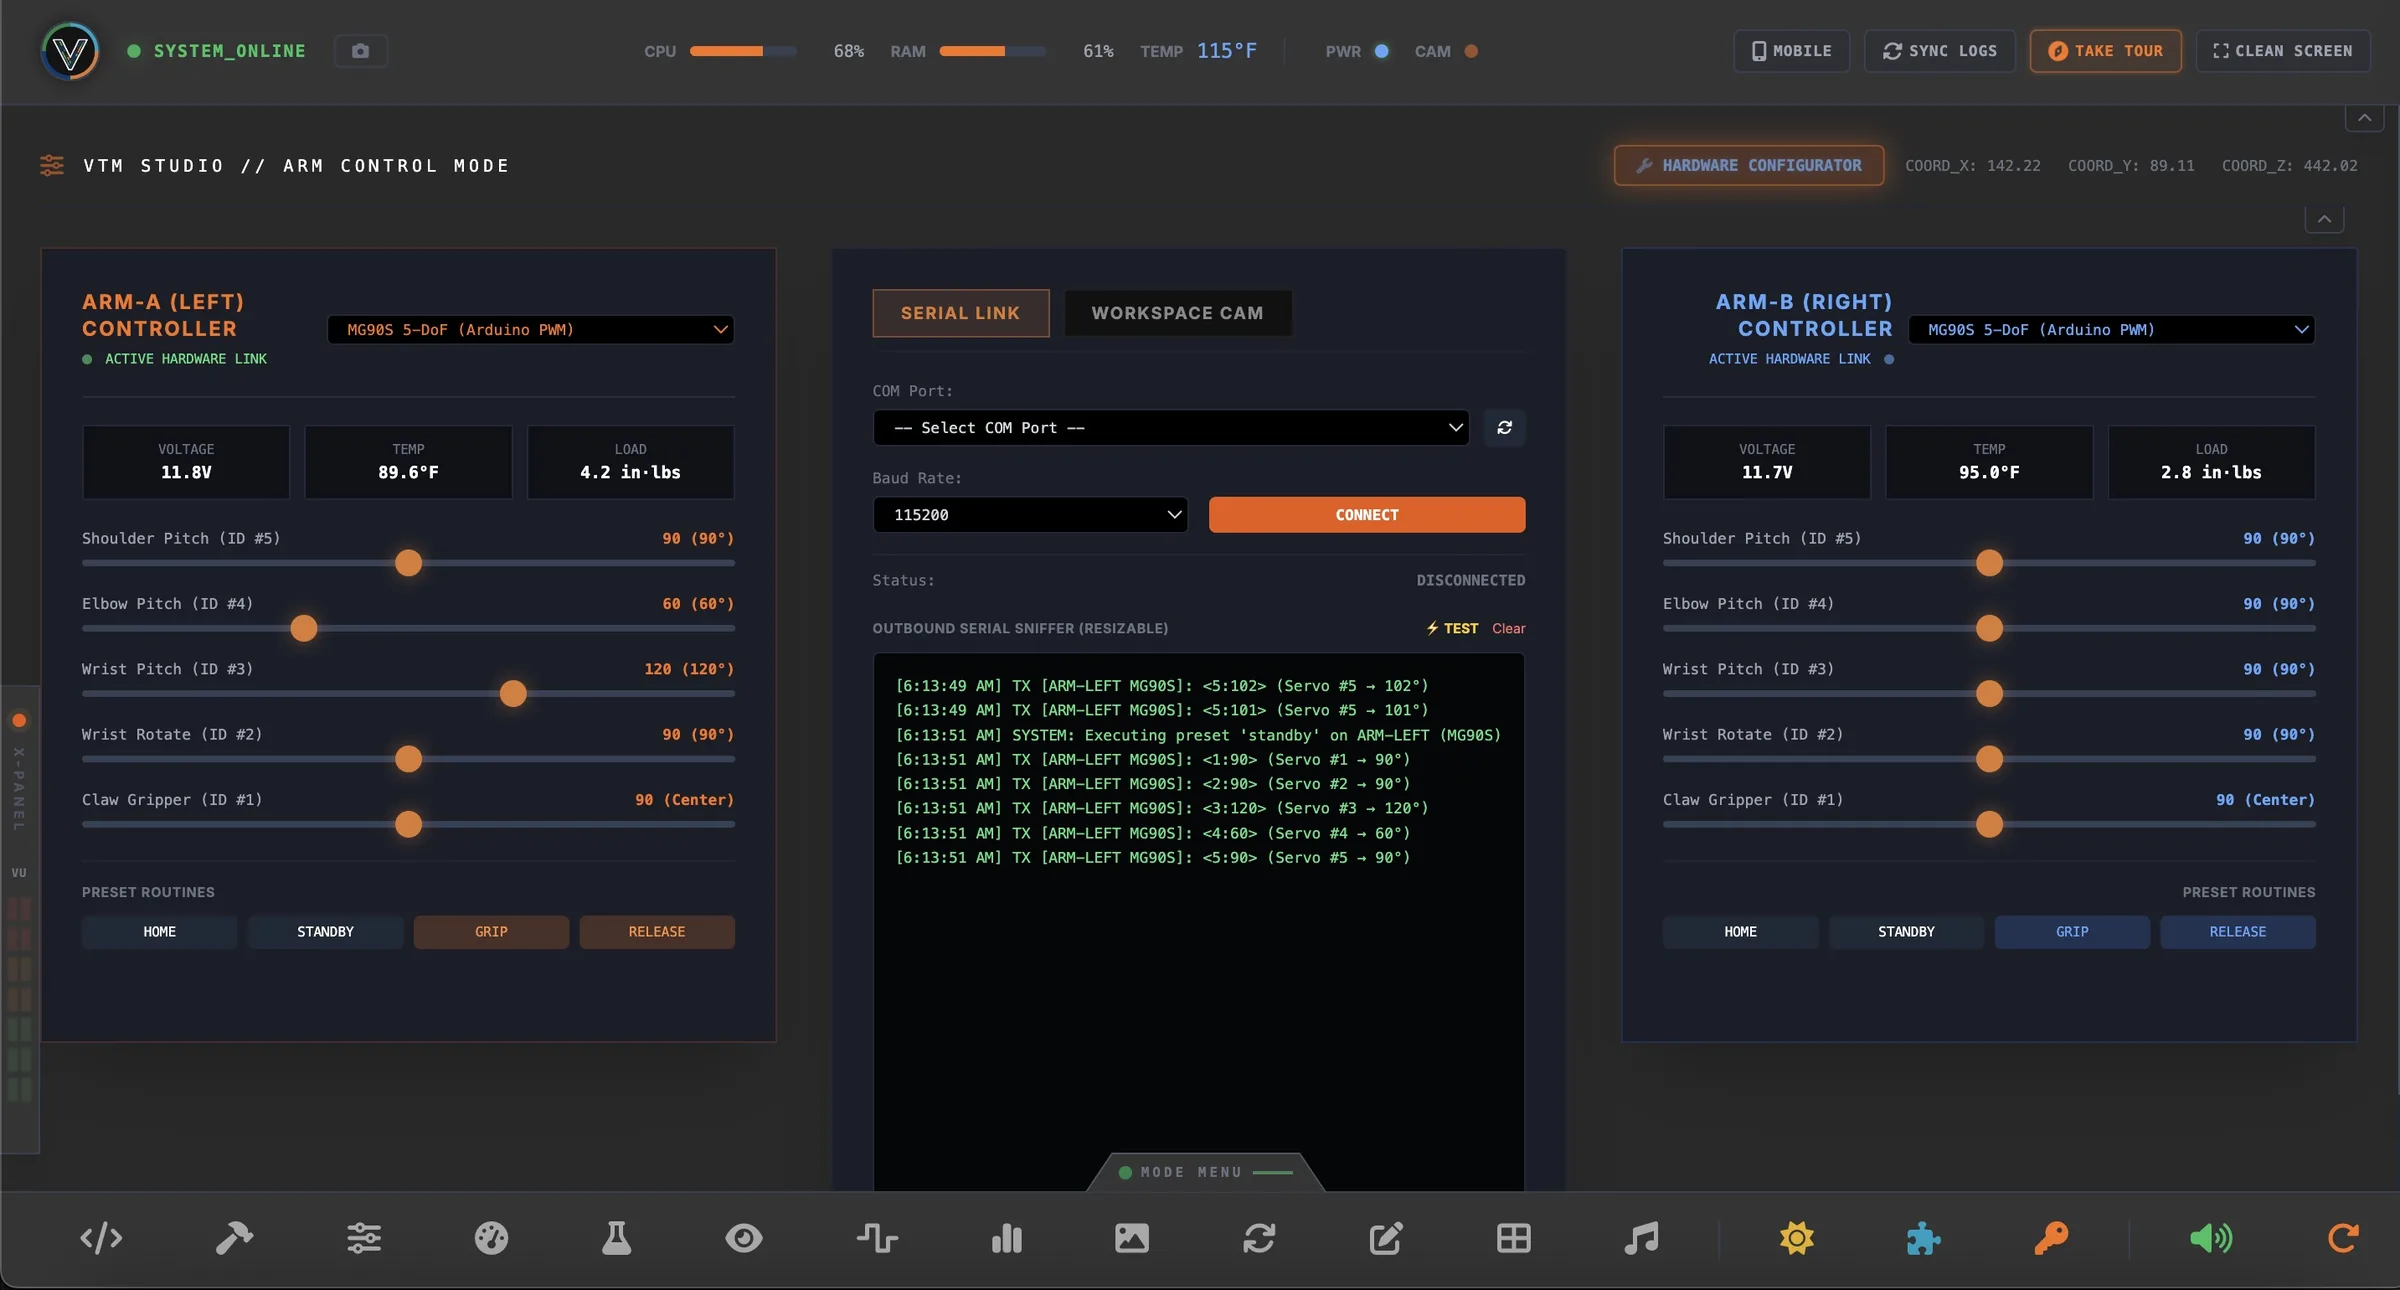
Tier 2 · Maker Pro PackWhy you use it: to calibrate and drive a real robot arm without writing a control program first. Connect a 5-DoF MG90S arm or a 6-DoF bus-servo arm over USB serial and move each joint with sliders or the mouse wheel. Hold Shift for fine steps. Presets cover common controllers. If your hardware uses its own protocol, the Custom Protocol Builder lets you define the packet format, with templates for PCA9685, Dynamixel AX-12A, and Lynxmotion SSC-32. A serial sniffer with dry-run mode shows every packet before it reaches your servos.
Vision Mode
Tier 1 · Maker PackWhy you use it: to give your project a camera and test what it can detect before you wire it into a robot. Pick any camera, including a USB webcam or an Android phone used as a webcam. VTM Vision runs on-device object detection with bounding boxes for 80 everyday object types. HSV Lock tracks a colored object, such as a yellow block for a pick-and-place arm, and reports its position live. (Cloud Vision, which uses Gemini to analyze frames from a text prompt, is part of the Physical AI Pro Pack.)
On Raspberry Pi and Arduino UNO Q: to keep these boards responsive, Vision Mode runs HSV Lock as the on-device tracker, along with Cloud Vision if you have the Physical AI Pro Pack. VTM Vision object detection is available on macOS and Windows.
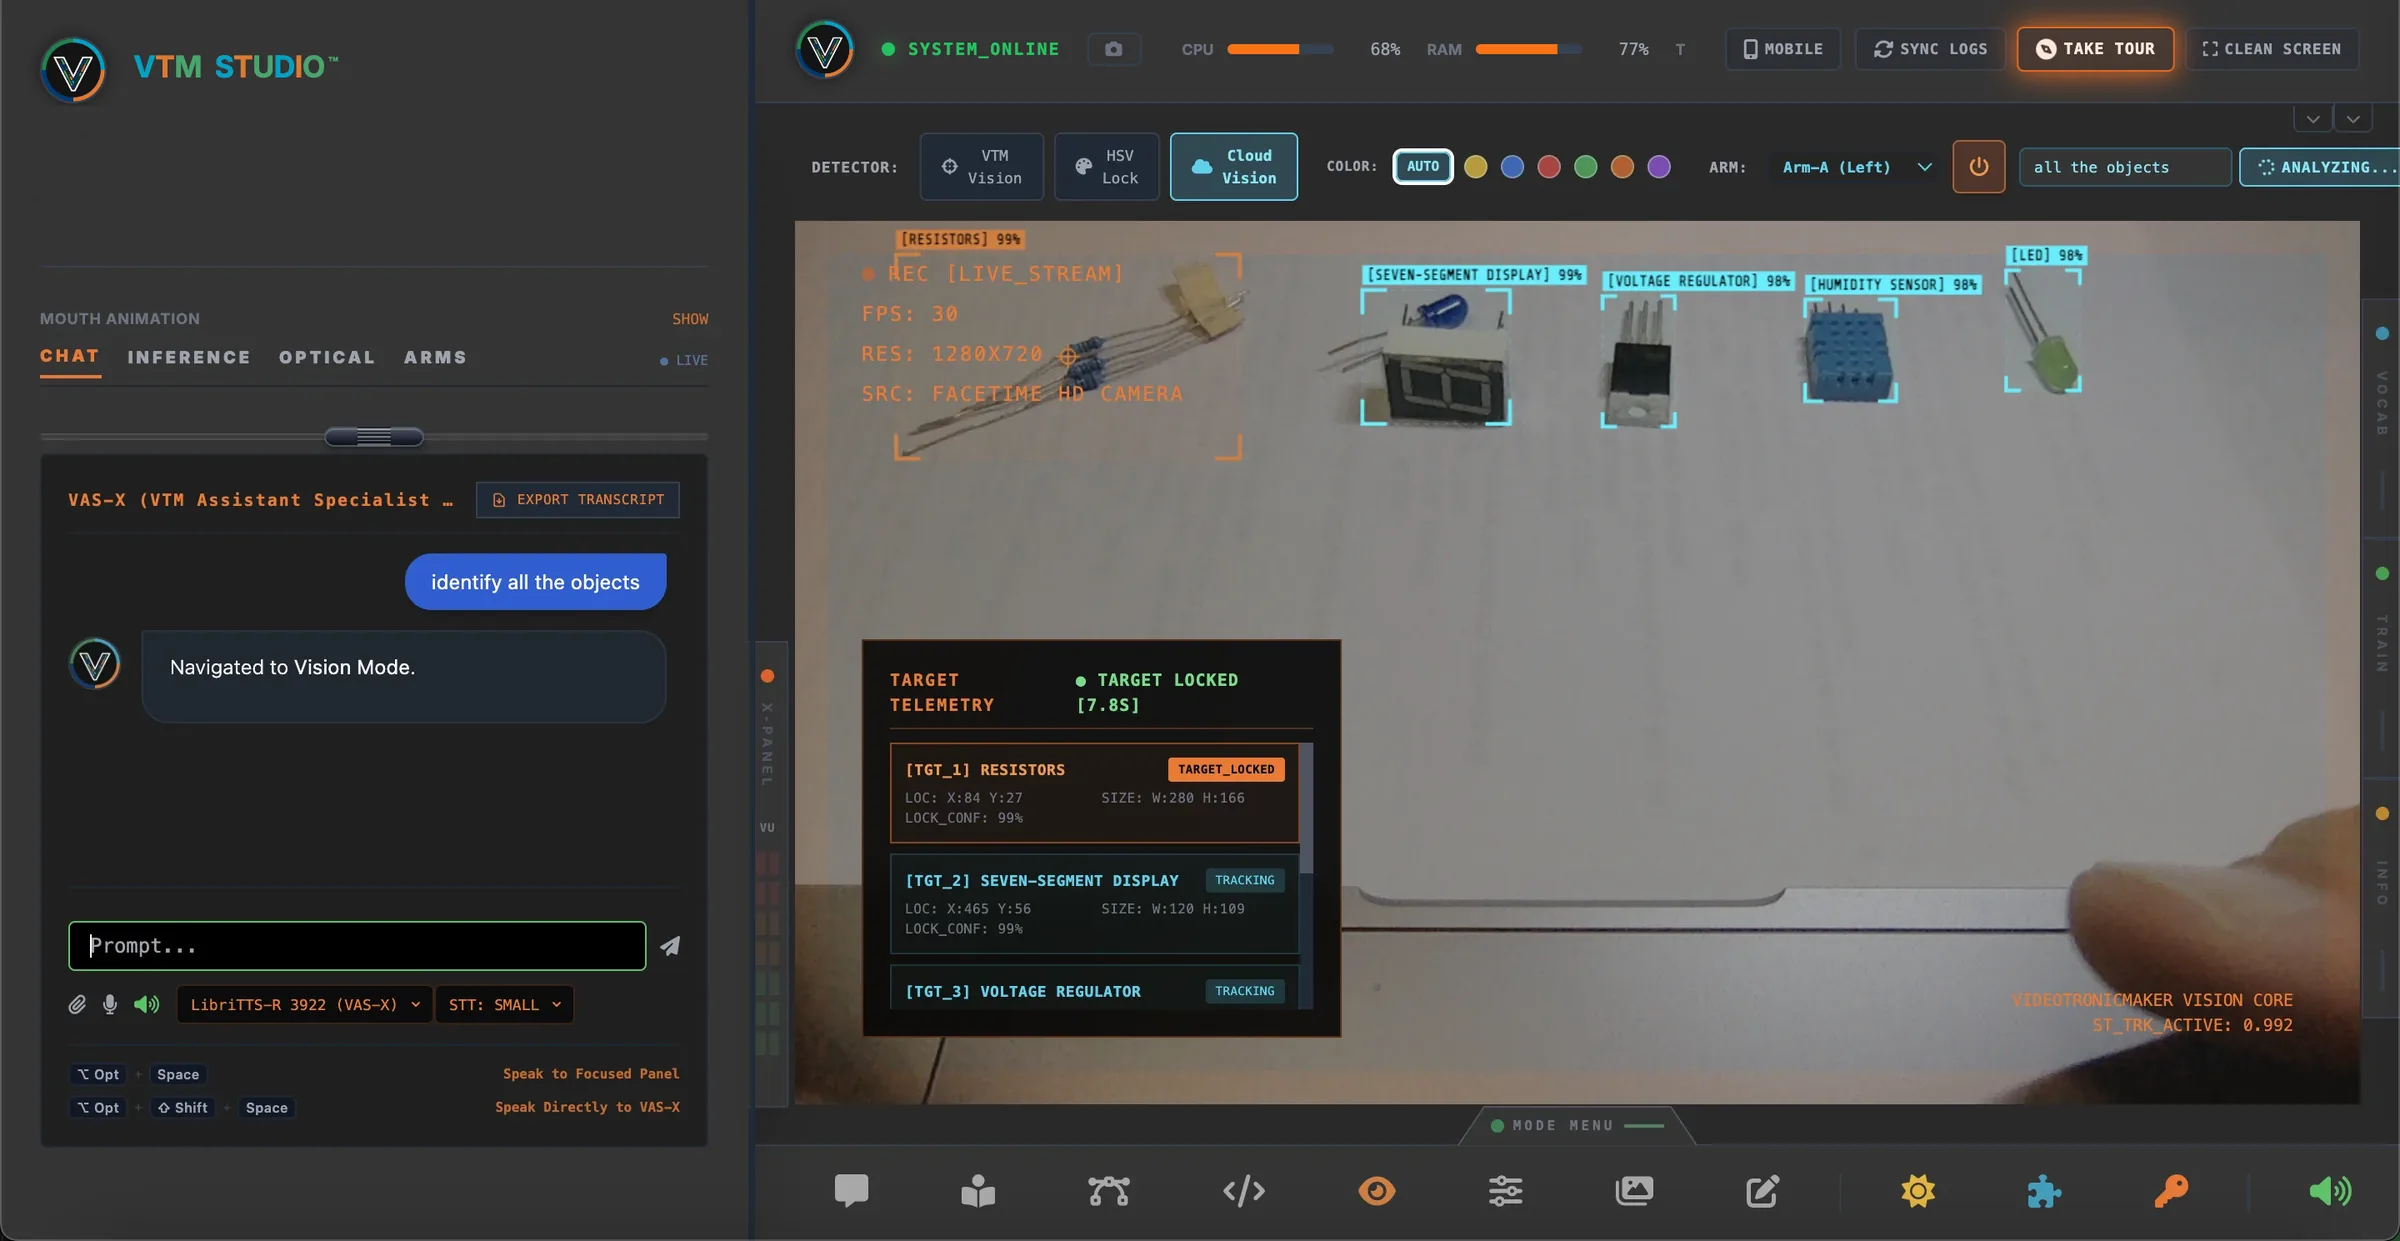
How the AI assistants fit in: VAS-X can switch Vision engines and target colors and take you to the right mode. ARC can write the sketch that acts on what you found. Results from Vision and Arm feed back into the code you are building in Code Mode.
Document and Share the Build
Making things costs money and time. Boards, sensors, servos, and filament add up fast. If you are building a portfolio, changing careers, or running a channel or website to help fund the hobby, documenting your builds matters. VTM Studio keeps those tools in the same workstation:
Layout Mode
Tier 1Draw wiring diagrams for your build guide. Parts from Spec Mode drop straight onto the artboard, and you can route straight, right-angle, or curved wires and export to PSD, SVG, or high-resolution PNG.
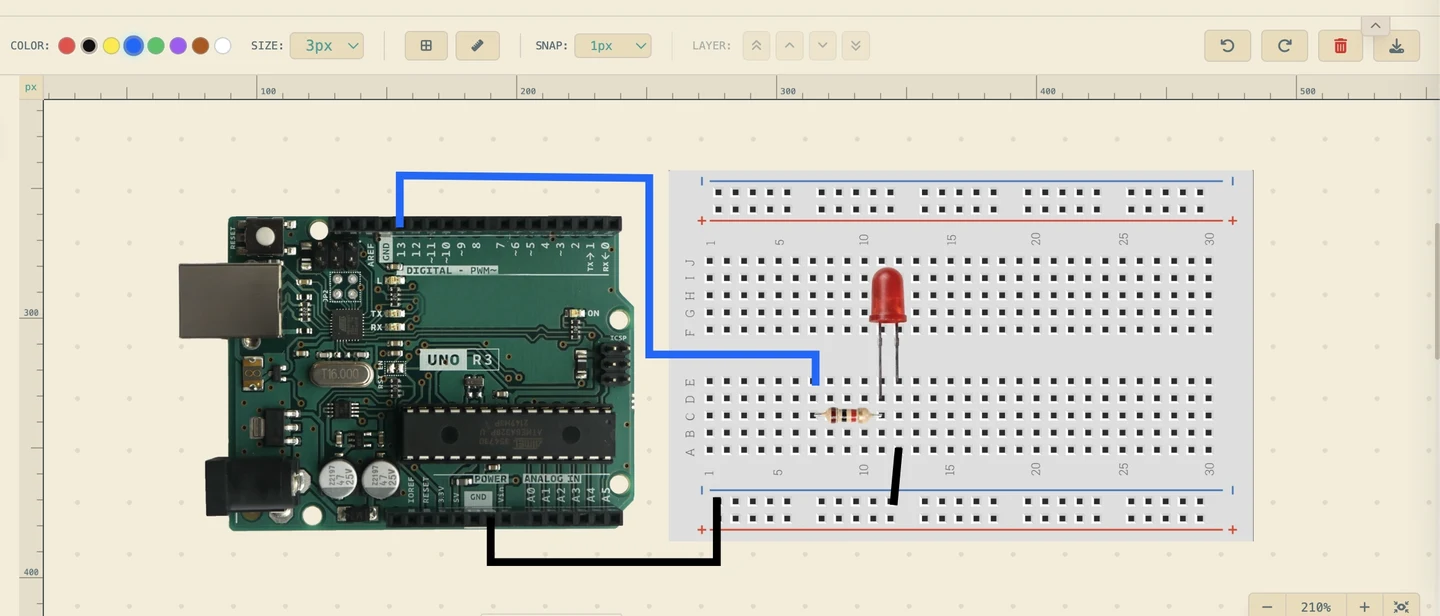
Image Mode
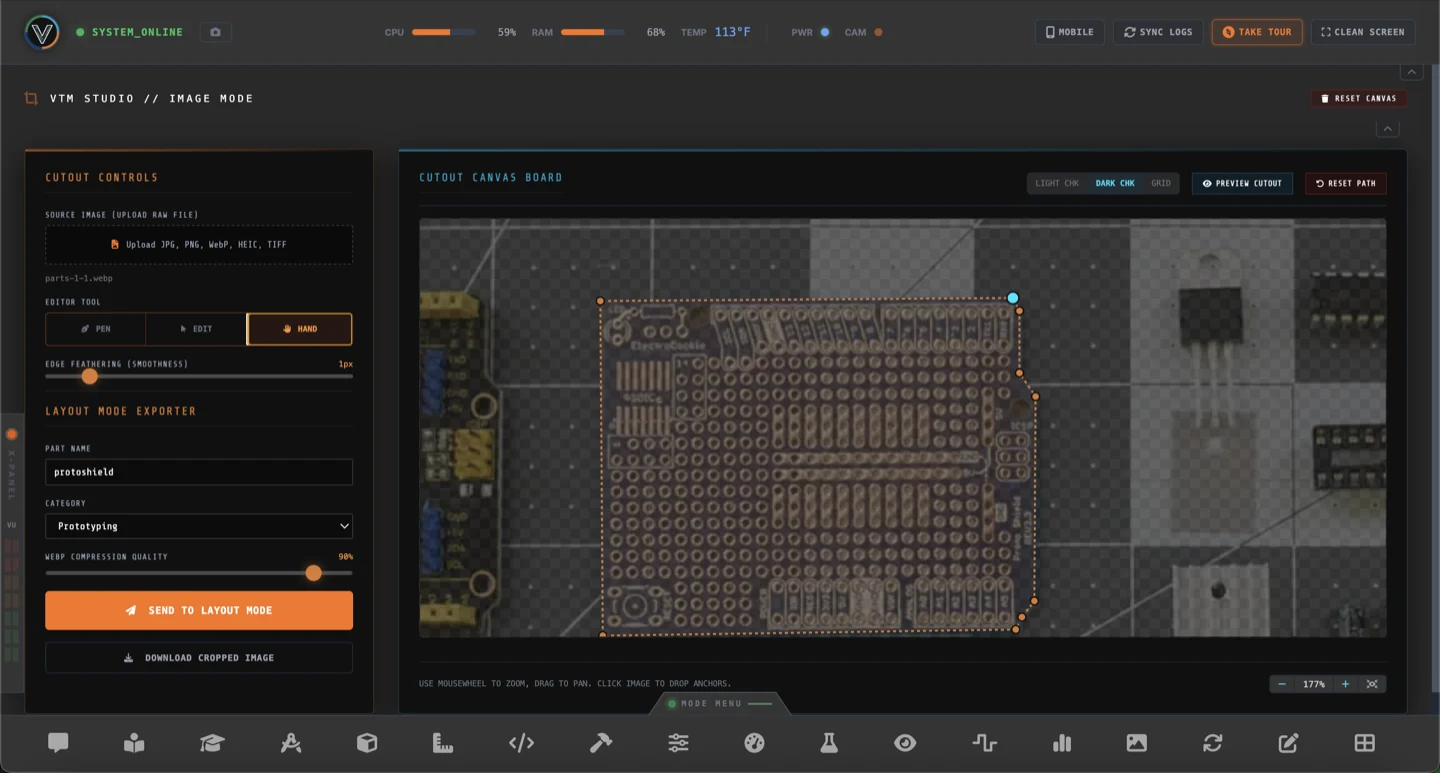
Tier 1Cut a component out of a photo and trace it as a clean vector, then send it to your Layout Mode library so your diagrams use your actual parts.
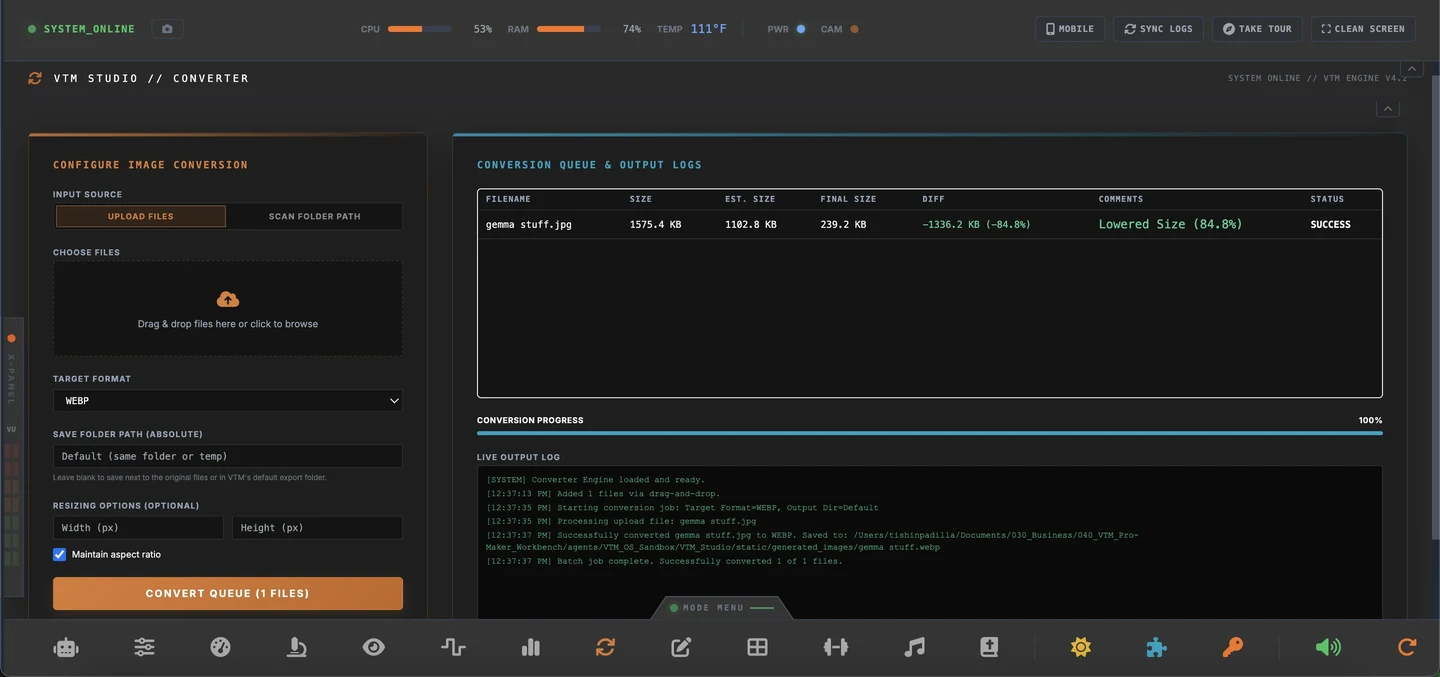
Converter Mode
Tier 2Batch-convert and resize project photos to the exact web-optimized formats and dimensions your website or video tutorials require.
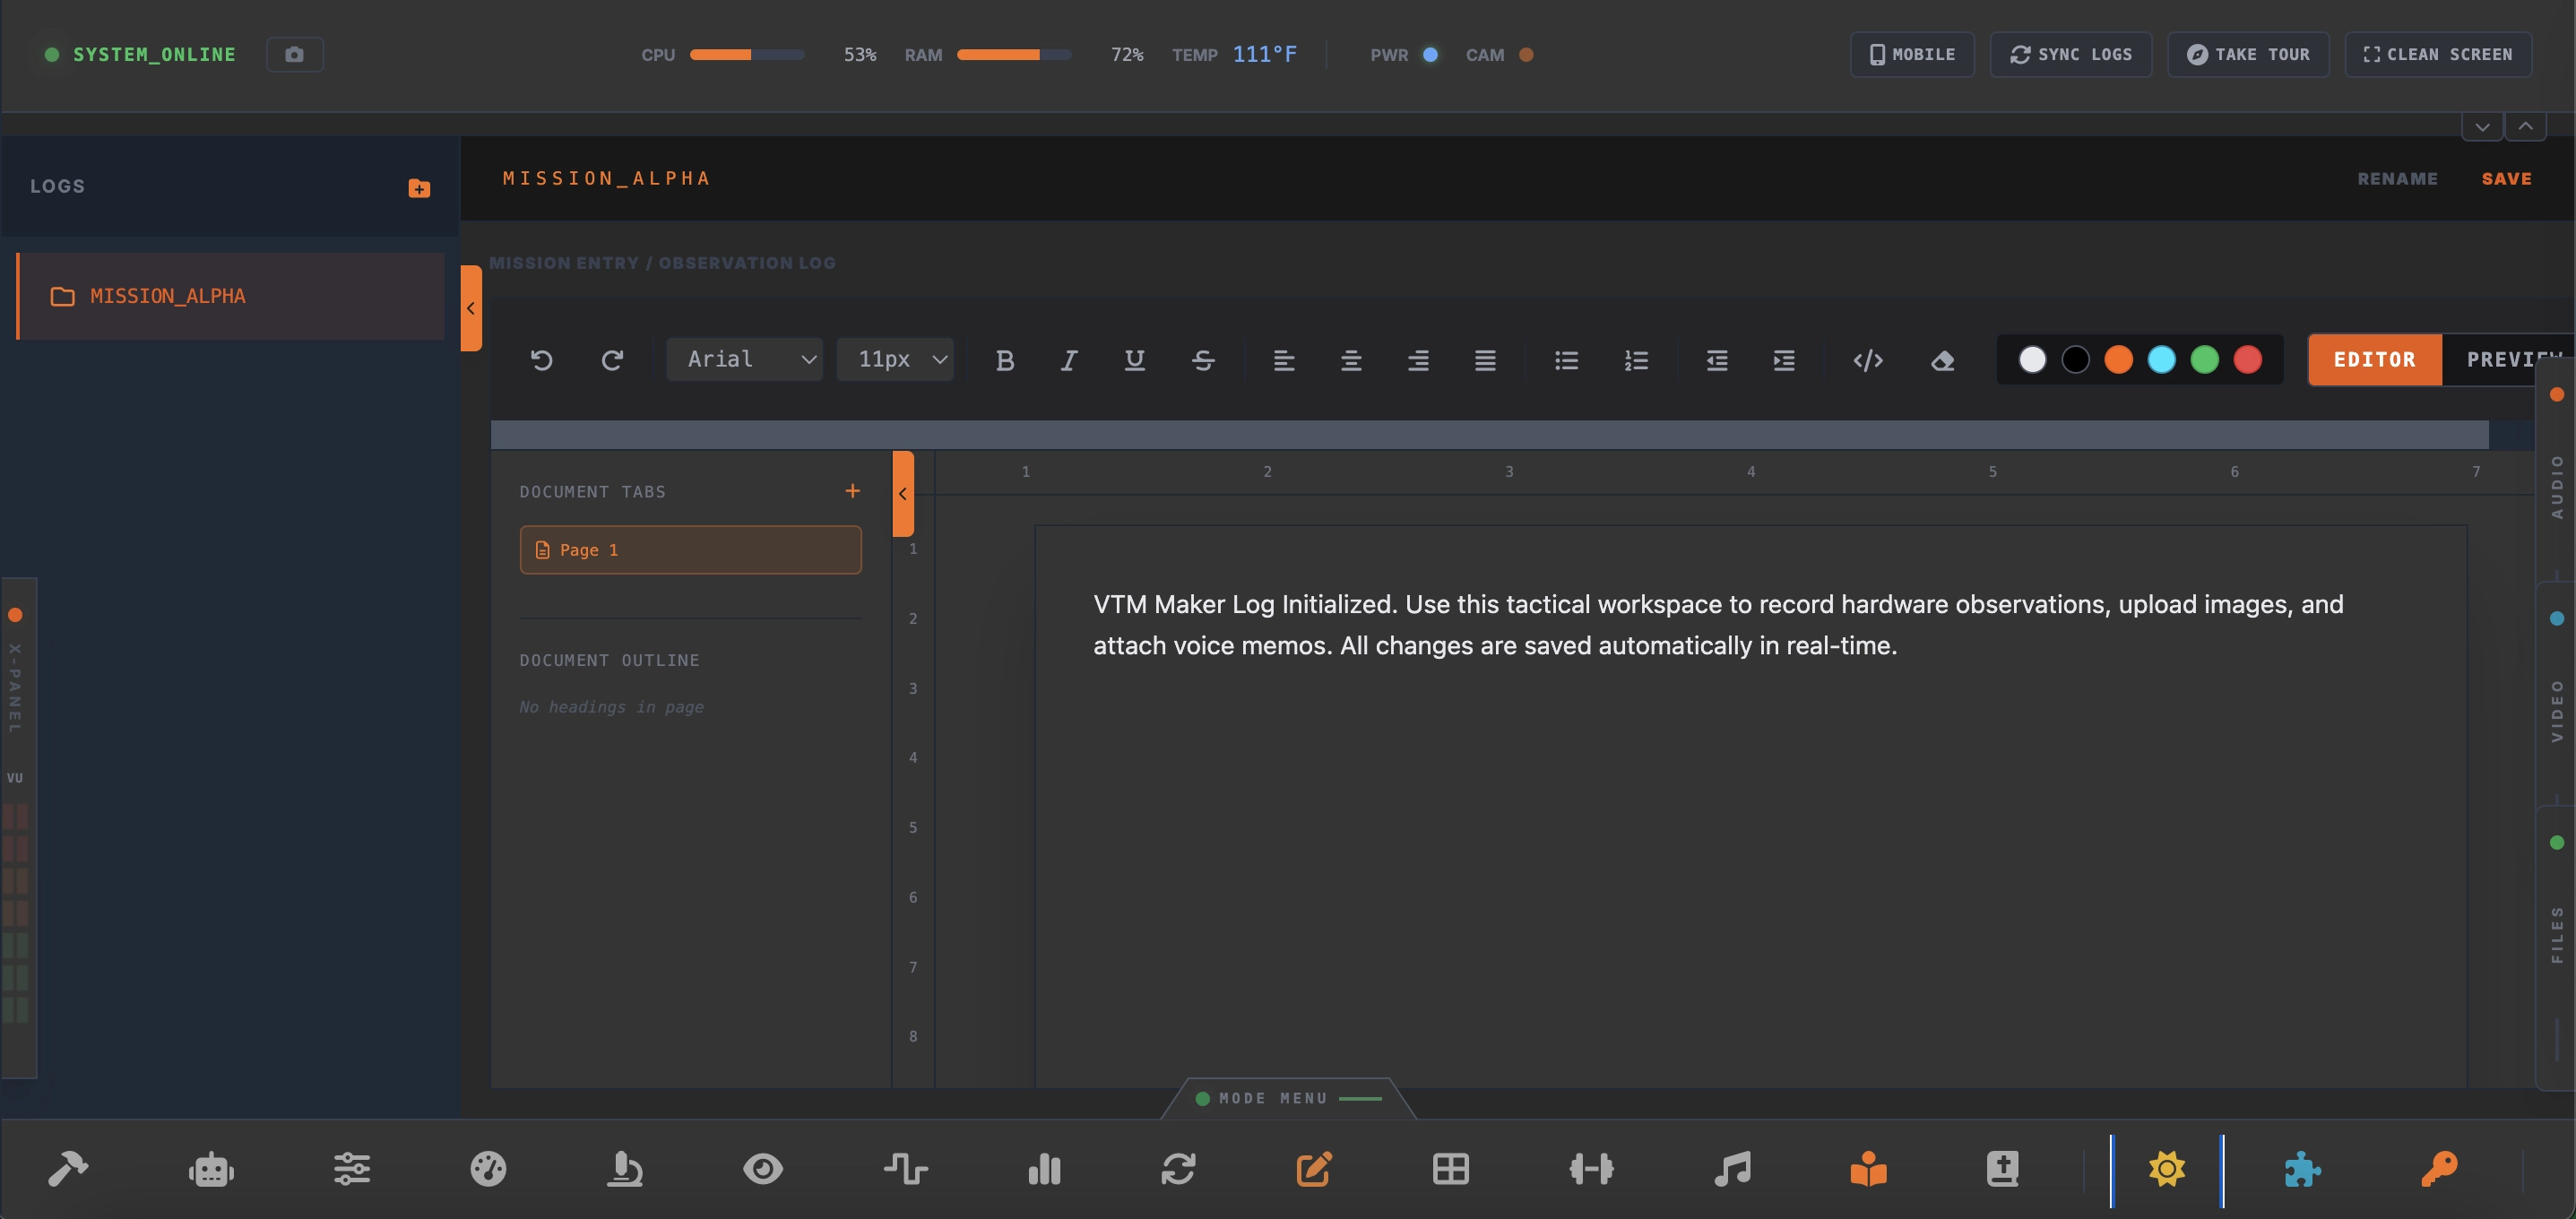
Log Mode
Tier 1Keep a running build journal with rich-text formatting, code blocks, attached media, and hands-free voice dictation for when your hands are on the soldering iron.
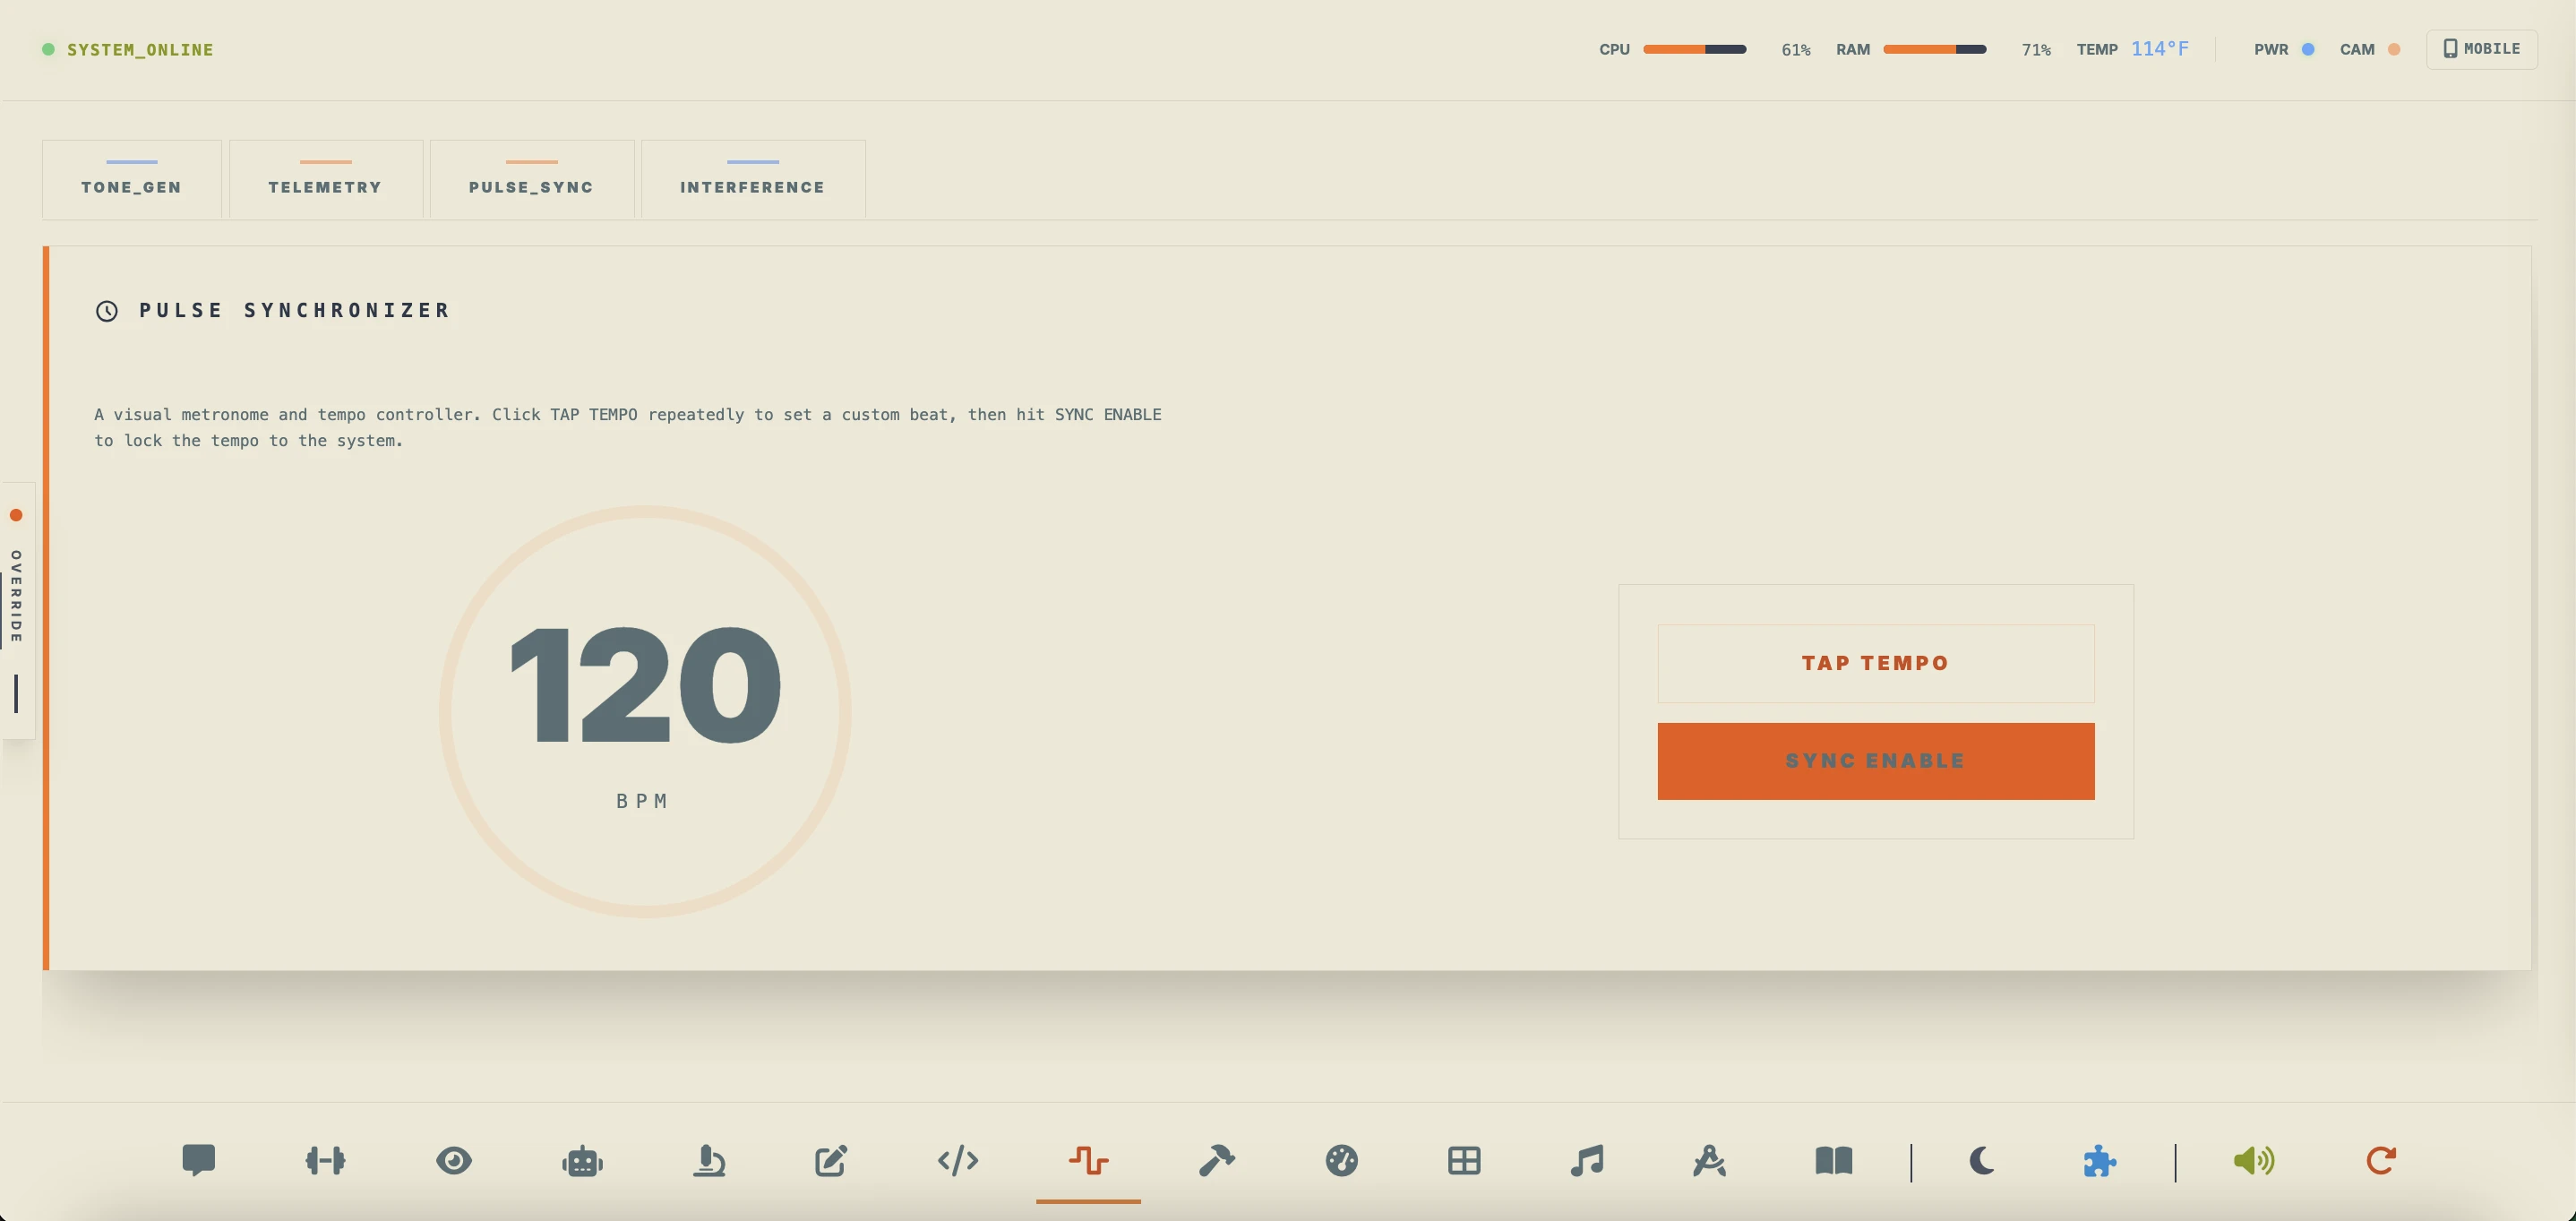
Audio Mode
Tier 1Generate tones and waveforms, export Arduino tone code, and test buzzer melodies before you flash them to your microcontrollers.
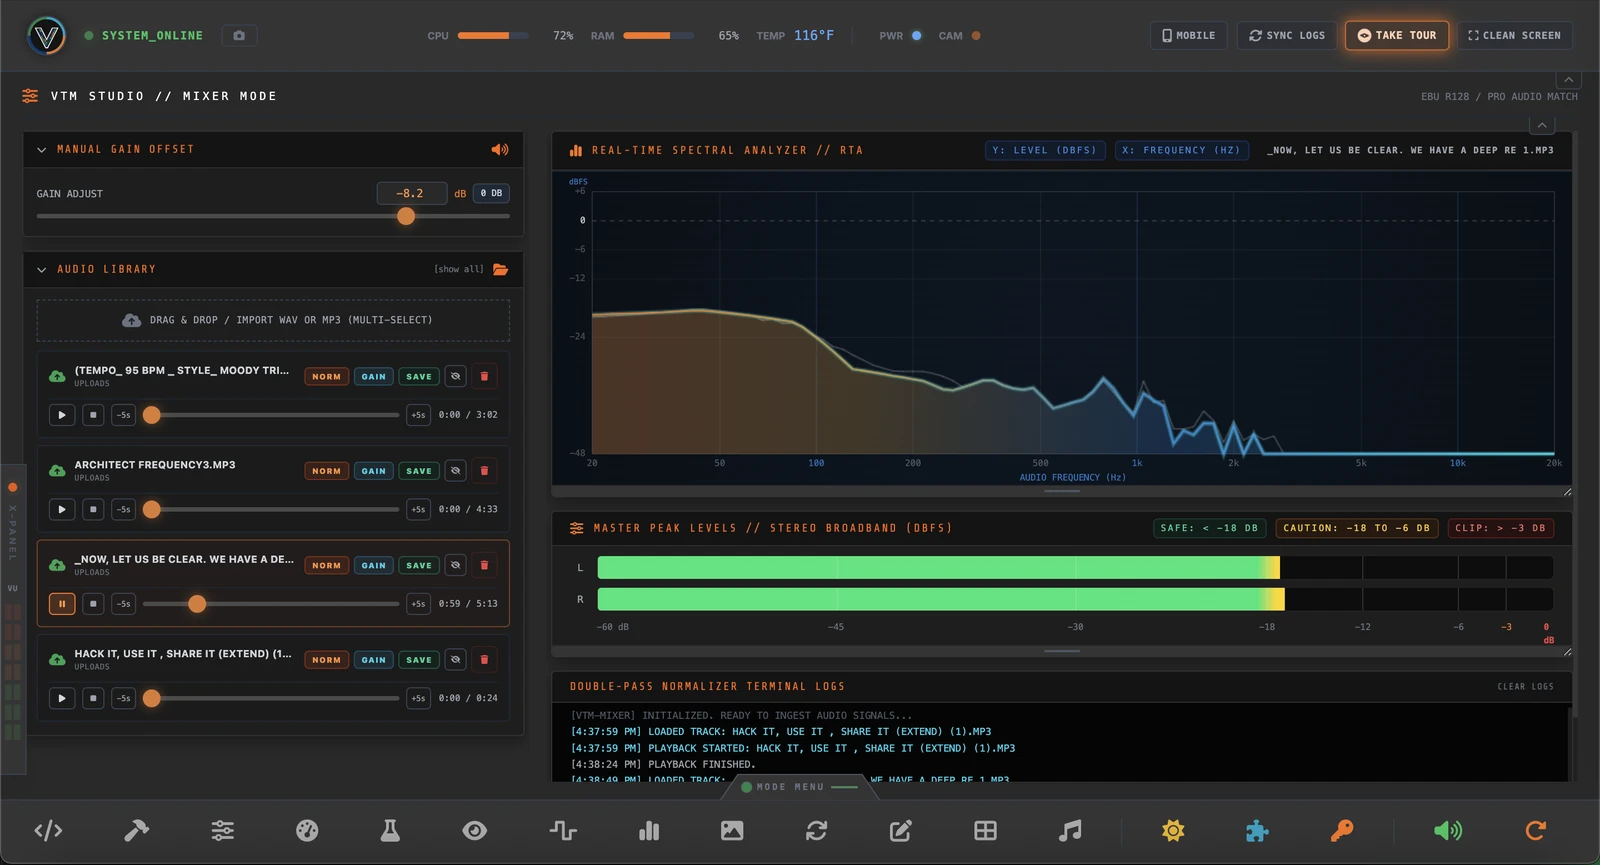
Mixer Mode
Tier 1Even out the loudness of your voiceovers and audio clips to broadcast standards (EBU R128) so every video tutorial plays back at the same professional level.
Mag Mode — Interactive 72-Page Manual
Tier 1 · Maker PackThe built-in 72-page interactive manual with narrated tours of every mode, so you can learn the studio at your own pace without searching online forums.
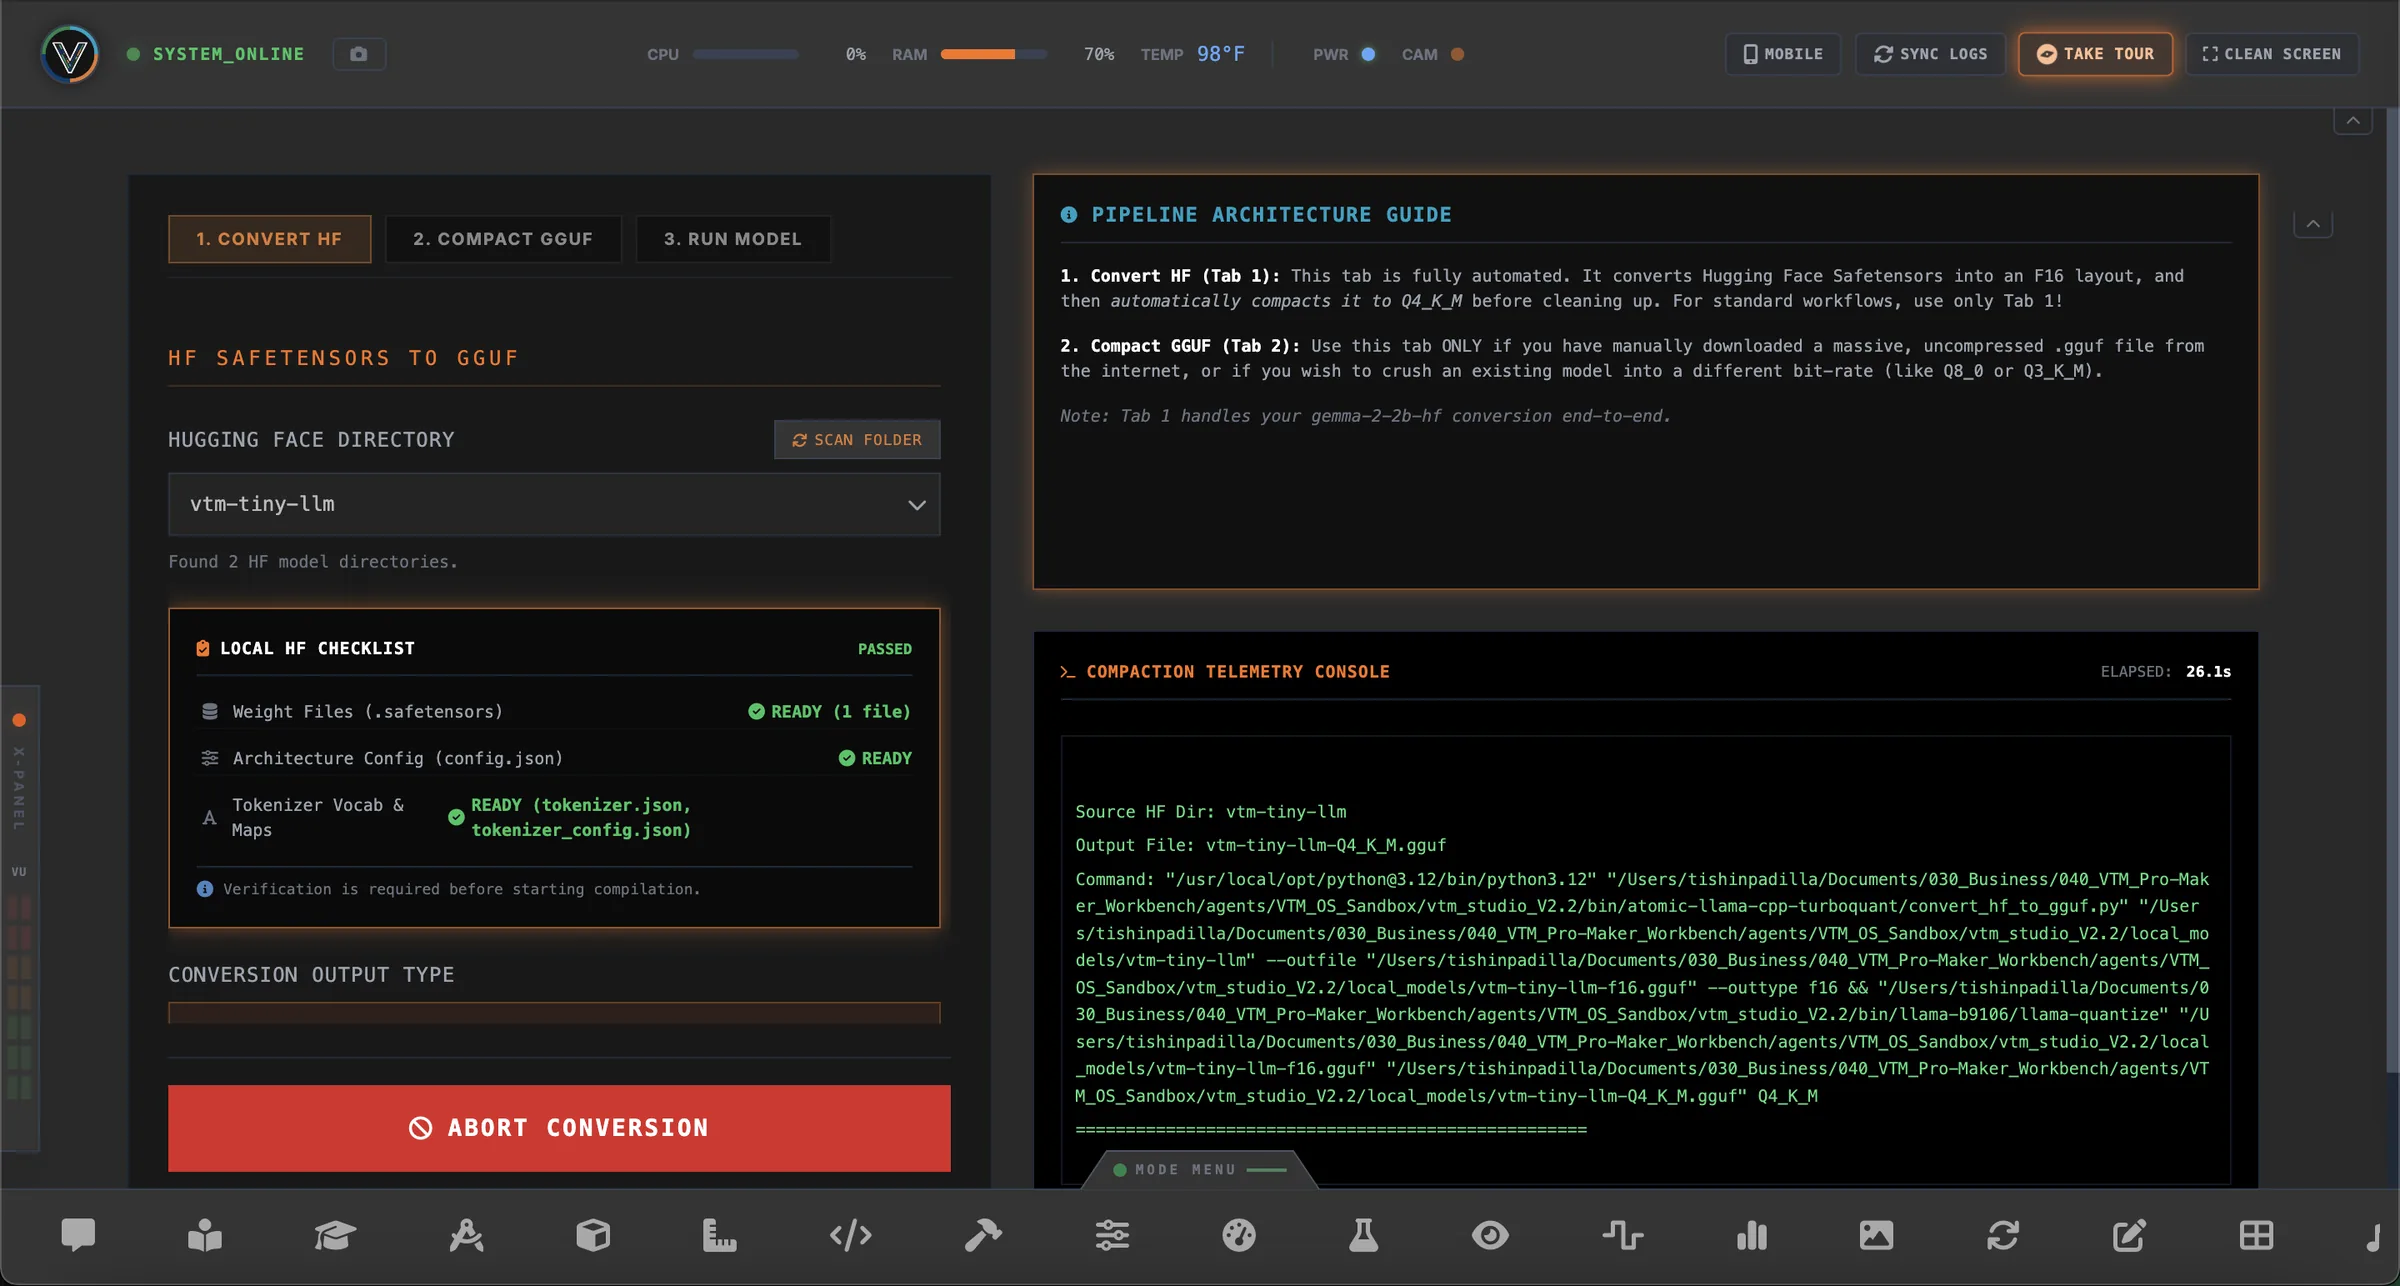
Building Your Own Local Models: Model Forge Mode
Cloud AI from Google Gemini and Groq does the heavy reasoning in VTM Studio. It is fast, capable, and free to start with. Local models do a different job: they keep working when there is no internet connection, they can run on the robot itself, and they let you keep a project entirely on your own machine. VTM Studio uses both.
To run a model locally, you usually need it as a compact, quantized .gguf file. For a long time, much of the local AI community relied on one generous contributor, known as "TheBloke," who converted and quantized models and shared them for everyone. When his uploads slowed, many makers were left asking: where do I get GGUF files now, and which ones can I trust?
That question matters. A model file runs on the same computer that holds your logins, your code, and your local network. I passed over a lot of promising open-weight models simply because I wasn't sure where the files had come from.
Model Forge Mode
Tier 3 · Physical AI Pro PackModel Forge Mode lets you make the file yourself:
- Download from the original creator: Pull the original Safetensors weights directly from the official Hugging Face repositories of model creators like Google, Qwen, DeepSeek, or Mistral.
- Convert and quantize on your own computer: Turn those weights into GGUF format and apply 4-bit or 8-bit quantization on your own local hardware.
- Run it in VTM Studio: Load the model you just built into VTM Studio's local AI engine. You know where the file came from because you made it yourself.
Do You Need My Hardware? No.
When people see photos of my builds, like the Entry Sentry, a dual-arm desktop robot built on my P³ (Physical Prototyping Platform), they sometimes ask whether they need that exact machine to use VTM Studio.
You don't. VTM Studio works with the boards, servos, sensors, and cameras you already have.
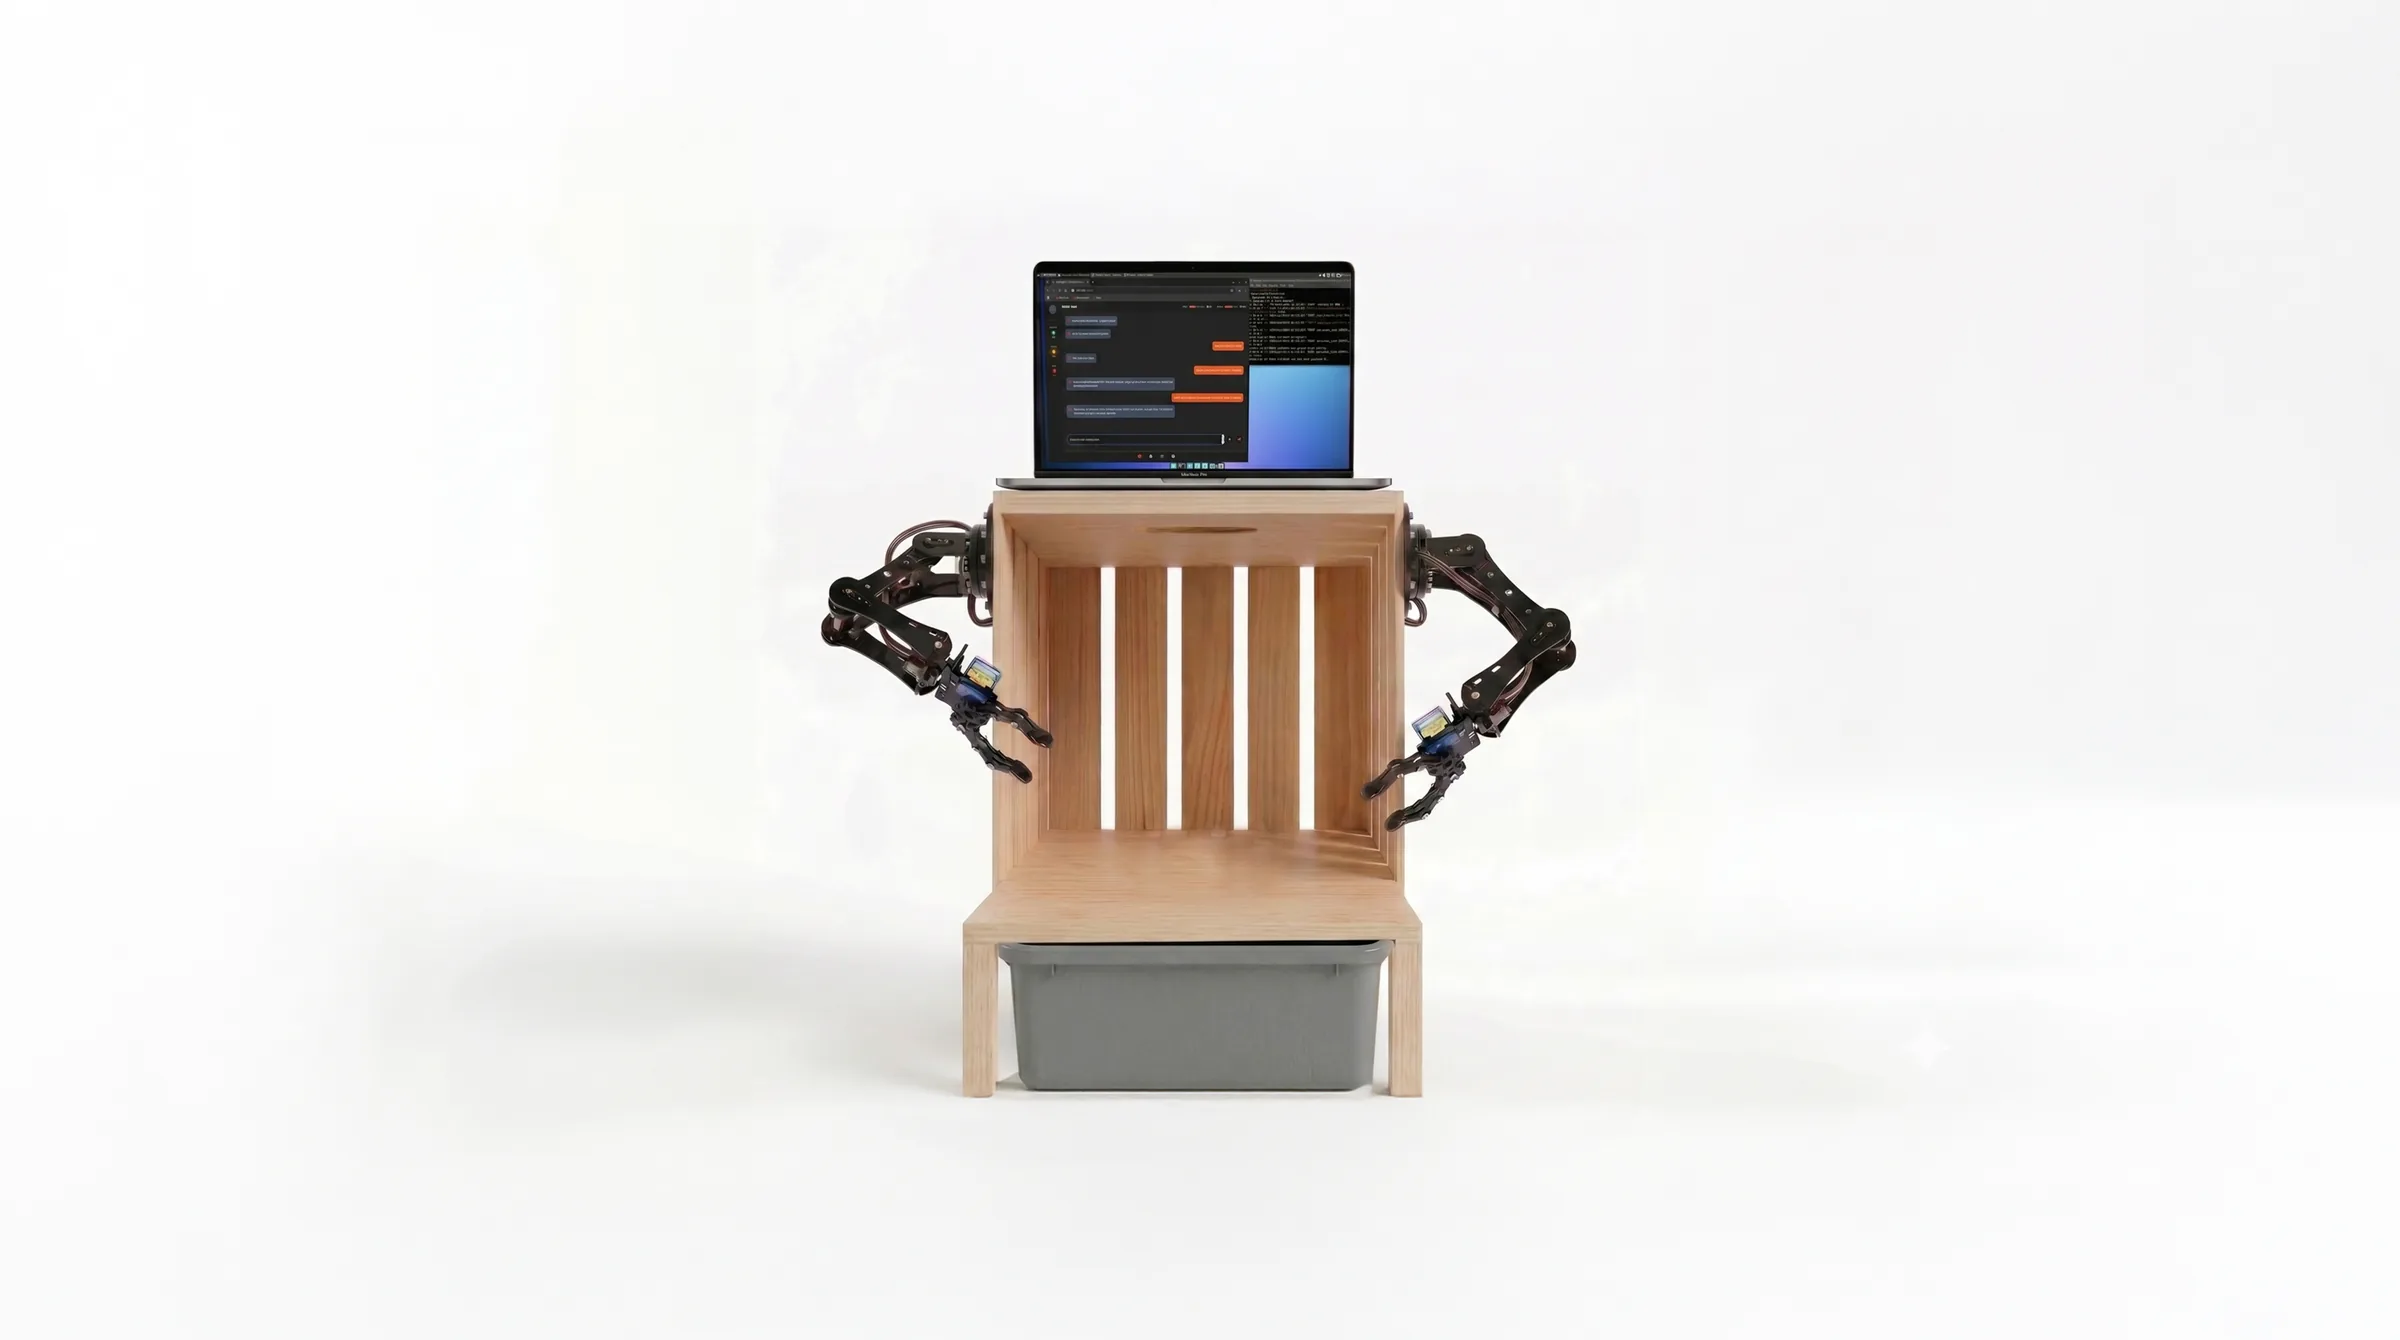
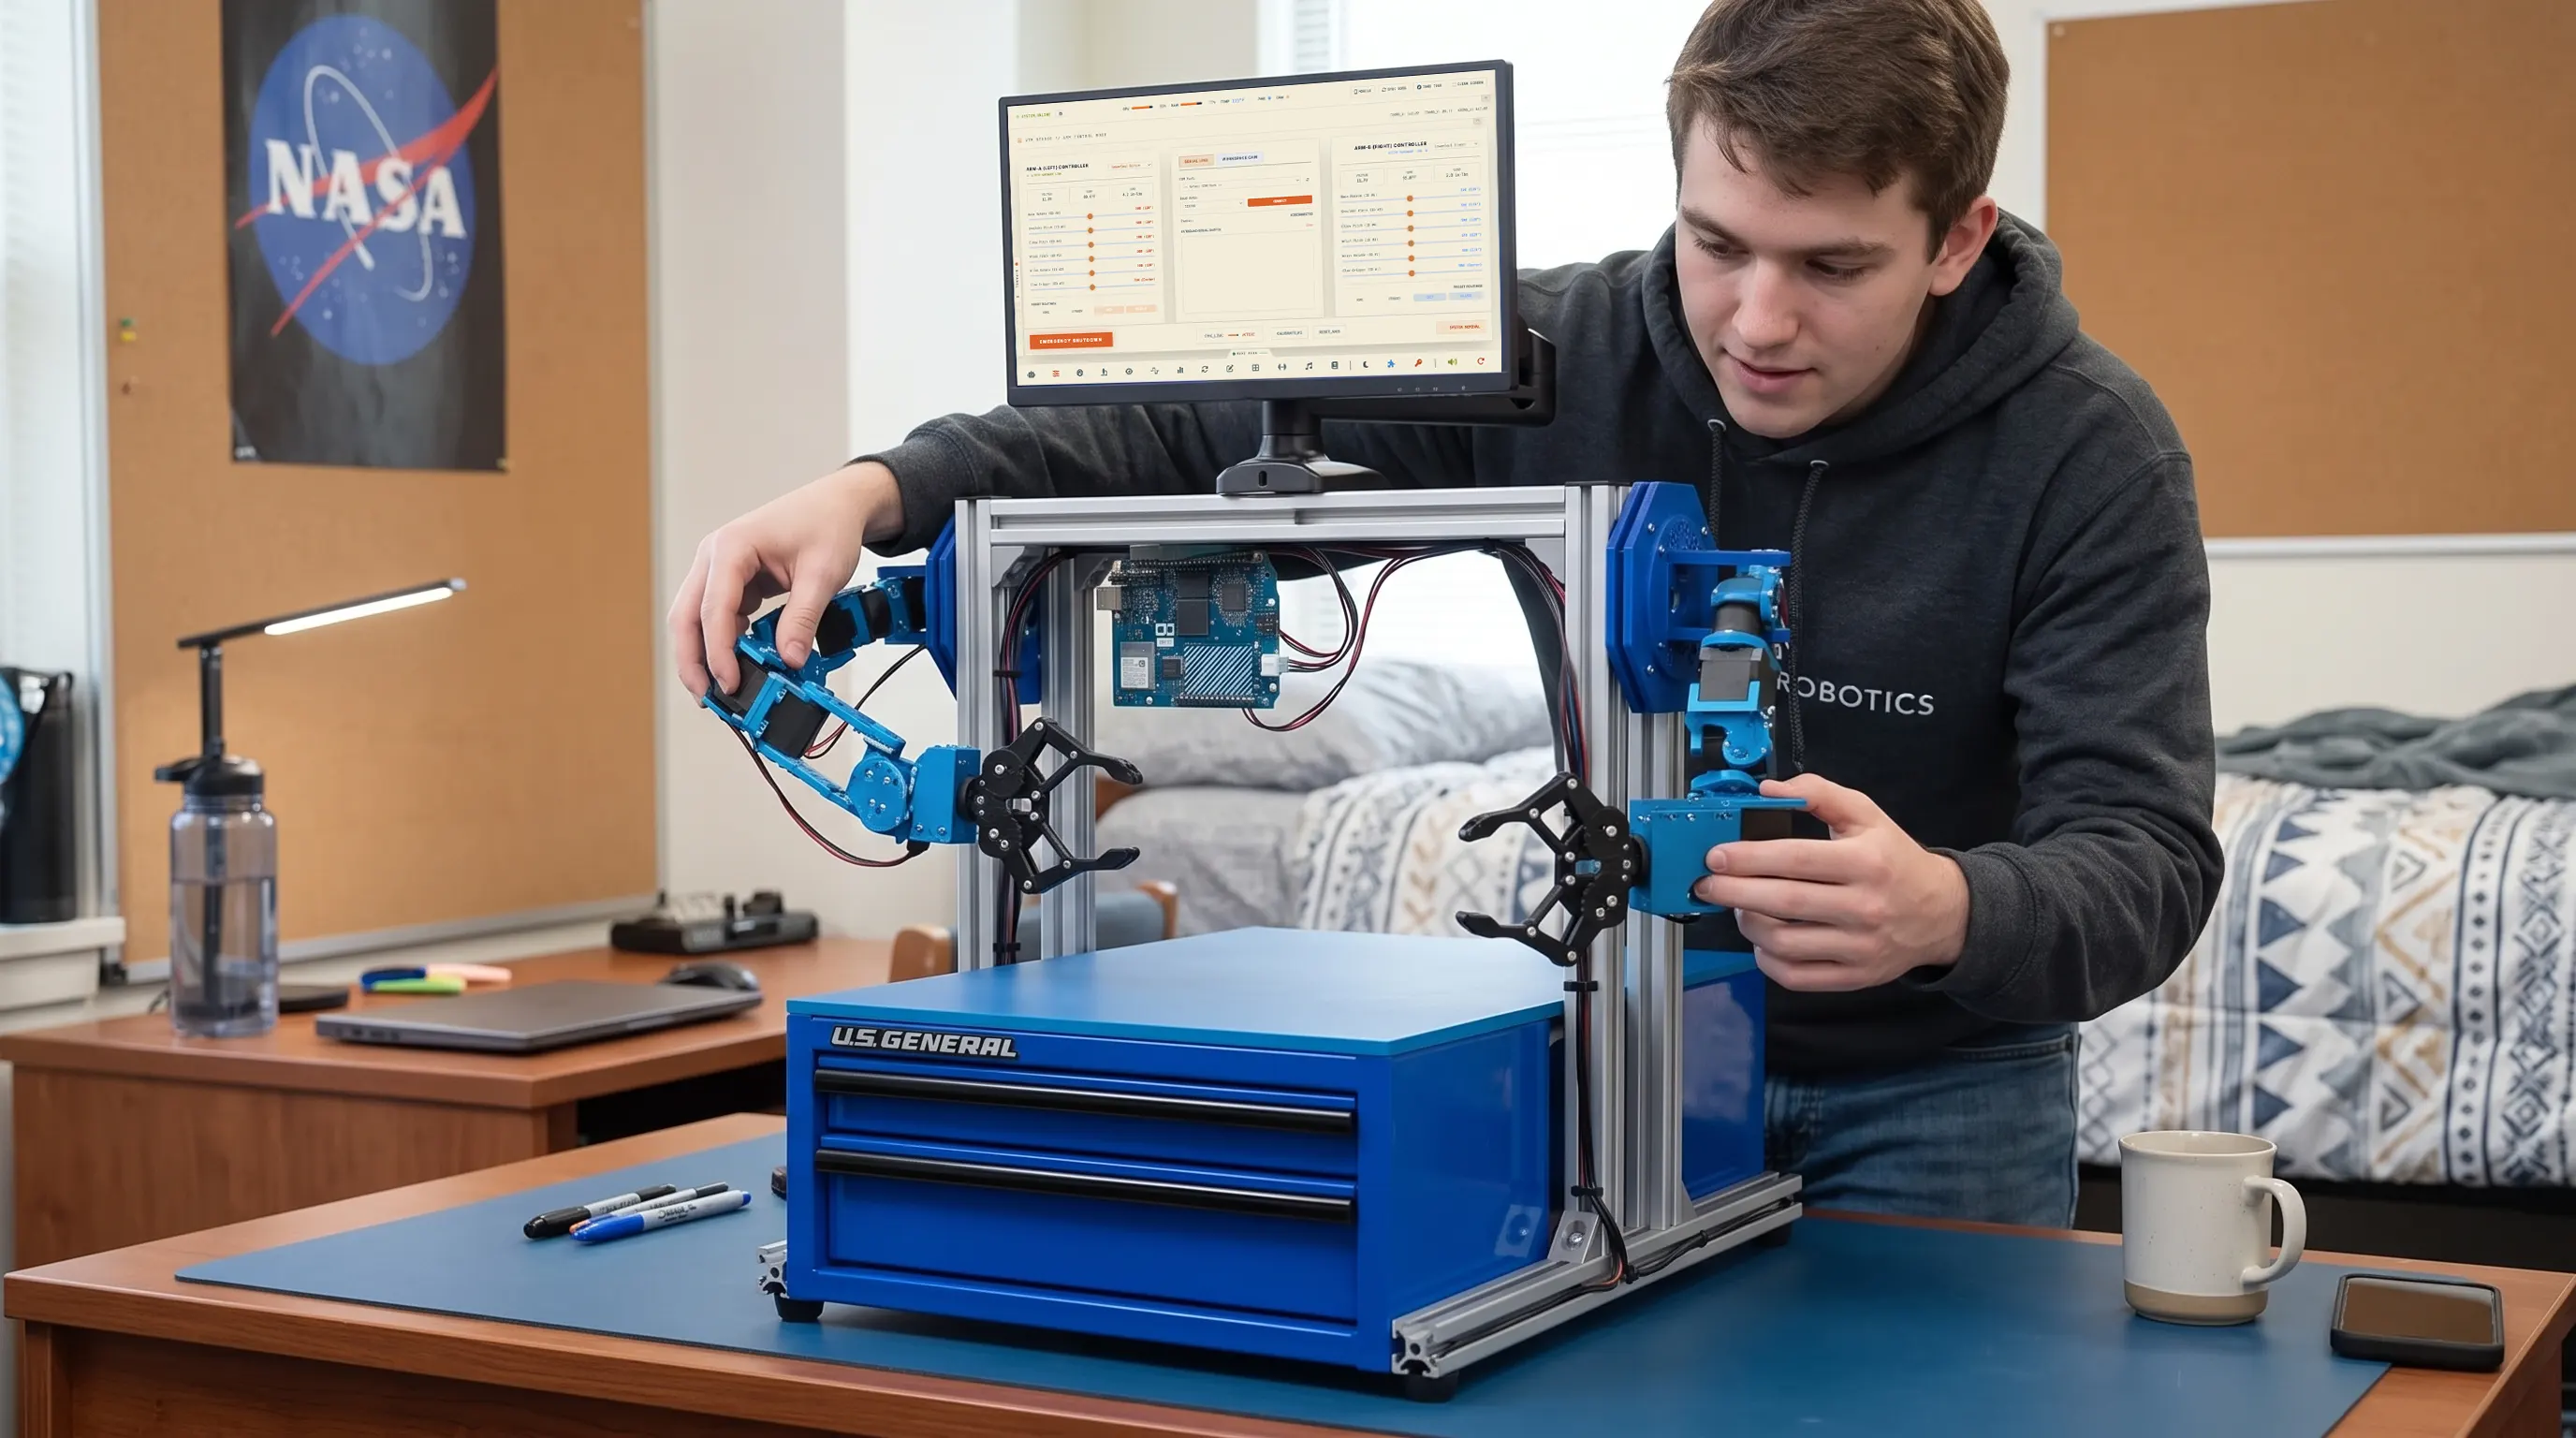
My P³ builds are real-world examples of what you can do when VTM Studio runs the whole project. The Entry Sentry was also meant to show that robotics doesn't require a thousand-dollar frame: each arm setup costs around $80. Build a frame from scrap wood, 3D-print an arm at your local library, buy a $15 pack of MG90S servos, and drive it all from VTM Studio on the computer you already own.
VTM Studio 2.2 has been tested driving real hardware on:
- macOS (Apple Silicon & Intel)
- Windows (Windows 10 & 11)
- Linux Desktop (such as Linux Mint, Ubuntu, Debian)
- Raspberry Pi (including the Raspberry Pi 4B)
- Arduino UNO Q, using its dual-processor architecture: a Qualcomm Snapdragon Linux MPU running alongside an STM32 MCU
Which VTM Studio Pack Fits Your Projects?
VTM Studio is built for the Pro-Maker: the hands-on builder, independent developer, student, or educator who wants one studio for the whole project. If you are wiring your first LED, you are welcome to jump in and learn with it. If you are an experienced engineer who just wants a fast serial dashboard and a local GGUF compiler, it is ready to work.
Every license is a one-time purchase that activates on up to two personal machines, for example your main computer and a Raspberry Pi or laptop.
| Commercial Pack | Founding Price | Regular Price | What's Included |
|---|---|---|---|
| Tier 1: Maker Pack | $9.99 | $29.99 | 13 modes: Chat (ARC and VAS-X with your own Gemini or Groq key), Mag, Reference, Spec, Layout, Code, Vision (VTM Vision and HSV Lock), Audio, Mixer, Image, Log, Favorites, and Music. |
| Tier 2: Maker Pro Pack | $19.99 | $59.99 | Everything in Maker Pack, plus 5 specialized modes: Study (OpenStax™ reader with ARC T-A), Arm (5- and 6-DoF servo control and custom protocols), Meter (multimeter display), Science (live sensor gauges and graphs), and Converter (batch image conversion and resizing). |
| Tier 3: Physical AI Pro Pack | $39.99 | $119.99 | Everything in Tiers 1 and 2, plus Model Forge (Hugging Face downloader, Safetensors-to-GGUF conversion, 4-bit and 8-bit quantization), local Edge AI models, and Cloud Vision. |
You keep full ownership of every sketch, layout, model, and log you create.
Build Without Friction or a Monthly Subscription
Explore the VTM Studio Store to lock in founding pricing across all three tiers or join the desktop installer waitlist.