Physical Computing with AI
If you have spent any time with an Arduino, an ESP32, or a Raspberry Pi, you already know the basic physical computing loop: a sensor reads light, temperature, or distance, the microcontroller processes that value in C++, and an output pin drives an LED, relay, display, or servo motor.
Physical AI is a newer term, and it fits right inside physical computing. Since AI is part of computing, Physical AI is really a natural continuation of the same craft: physical computing with AI in the loop. That is what makes physical AI for makers so approachable—you build on top of the microcontrollers, sensors, and servos you may already have on your desk. Instead of stopping at a hardcoded if/else threshold inside a sketch, your microcontroller streams live serial data to a computer or single-board computer where computer vision, speech recognition, and language models can inspect what is happening and help control the hardware.
With the upcoming release of VTM Studio, the goal was to put that entire workflow in one place so you do not have to jump between separate physical computing software and physical AI software. As all in one physical computing software, VTM Studio starts with the software and grows into whatever physical project you want to build—whether that is a single sensor on a breadboard, a low-cost wooden crate prototype, or a full multi-display robotics rig. It runs on macOS, Windows, Linux, Raspberry Pi 4B, and the Arduino UNO Q, and works with the boards, sensors, servos, and USB cameras you may already own.
One Physical AI Example: How an $800–$1,200 Maker Pro P³ Concept Led to the Under-$100 Entry Sentry P³
You can start a physical computing project with almost anything—a robotic arm, a LoRa module (one of my early prototypes back when I was experimenting with VTM OS was simply getting LoRa telemetry onto the screen, a feature I kept when I built VTM Studio), a temperature sensor, or a couple of servos. When you add AI to that hardware, you have Physical AI.
When I began designing a physical prototyping platform (P³) to hold everything together around VTM Studio, I first conceptualized the full Maker Pro P³:
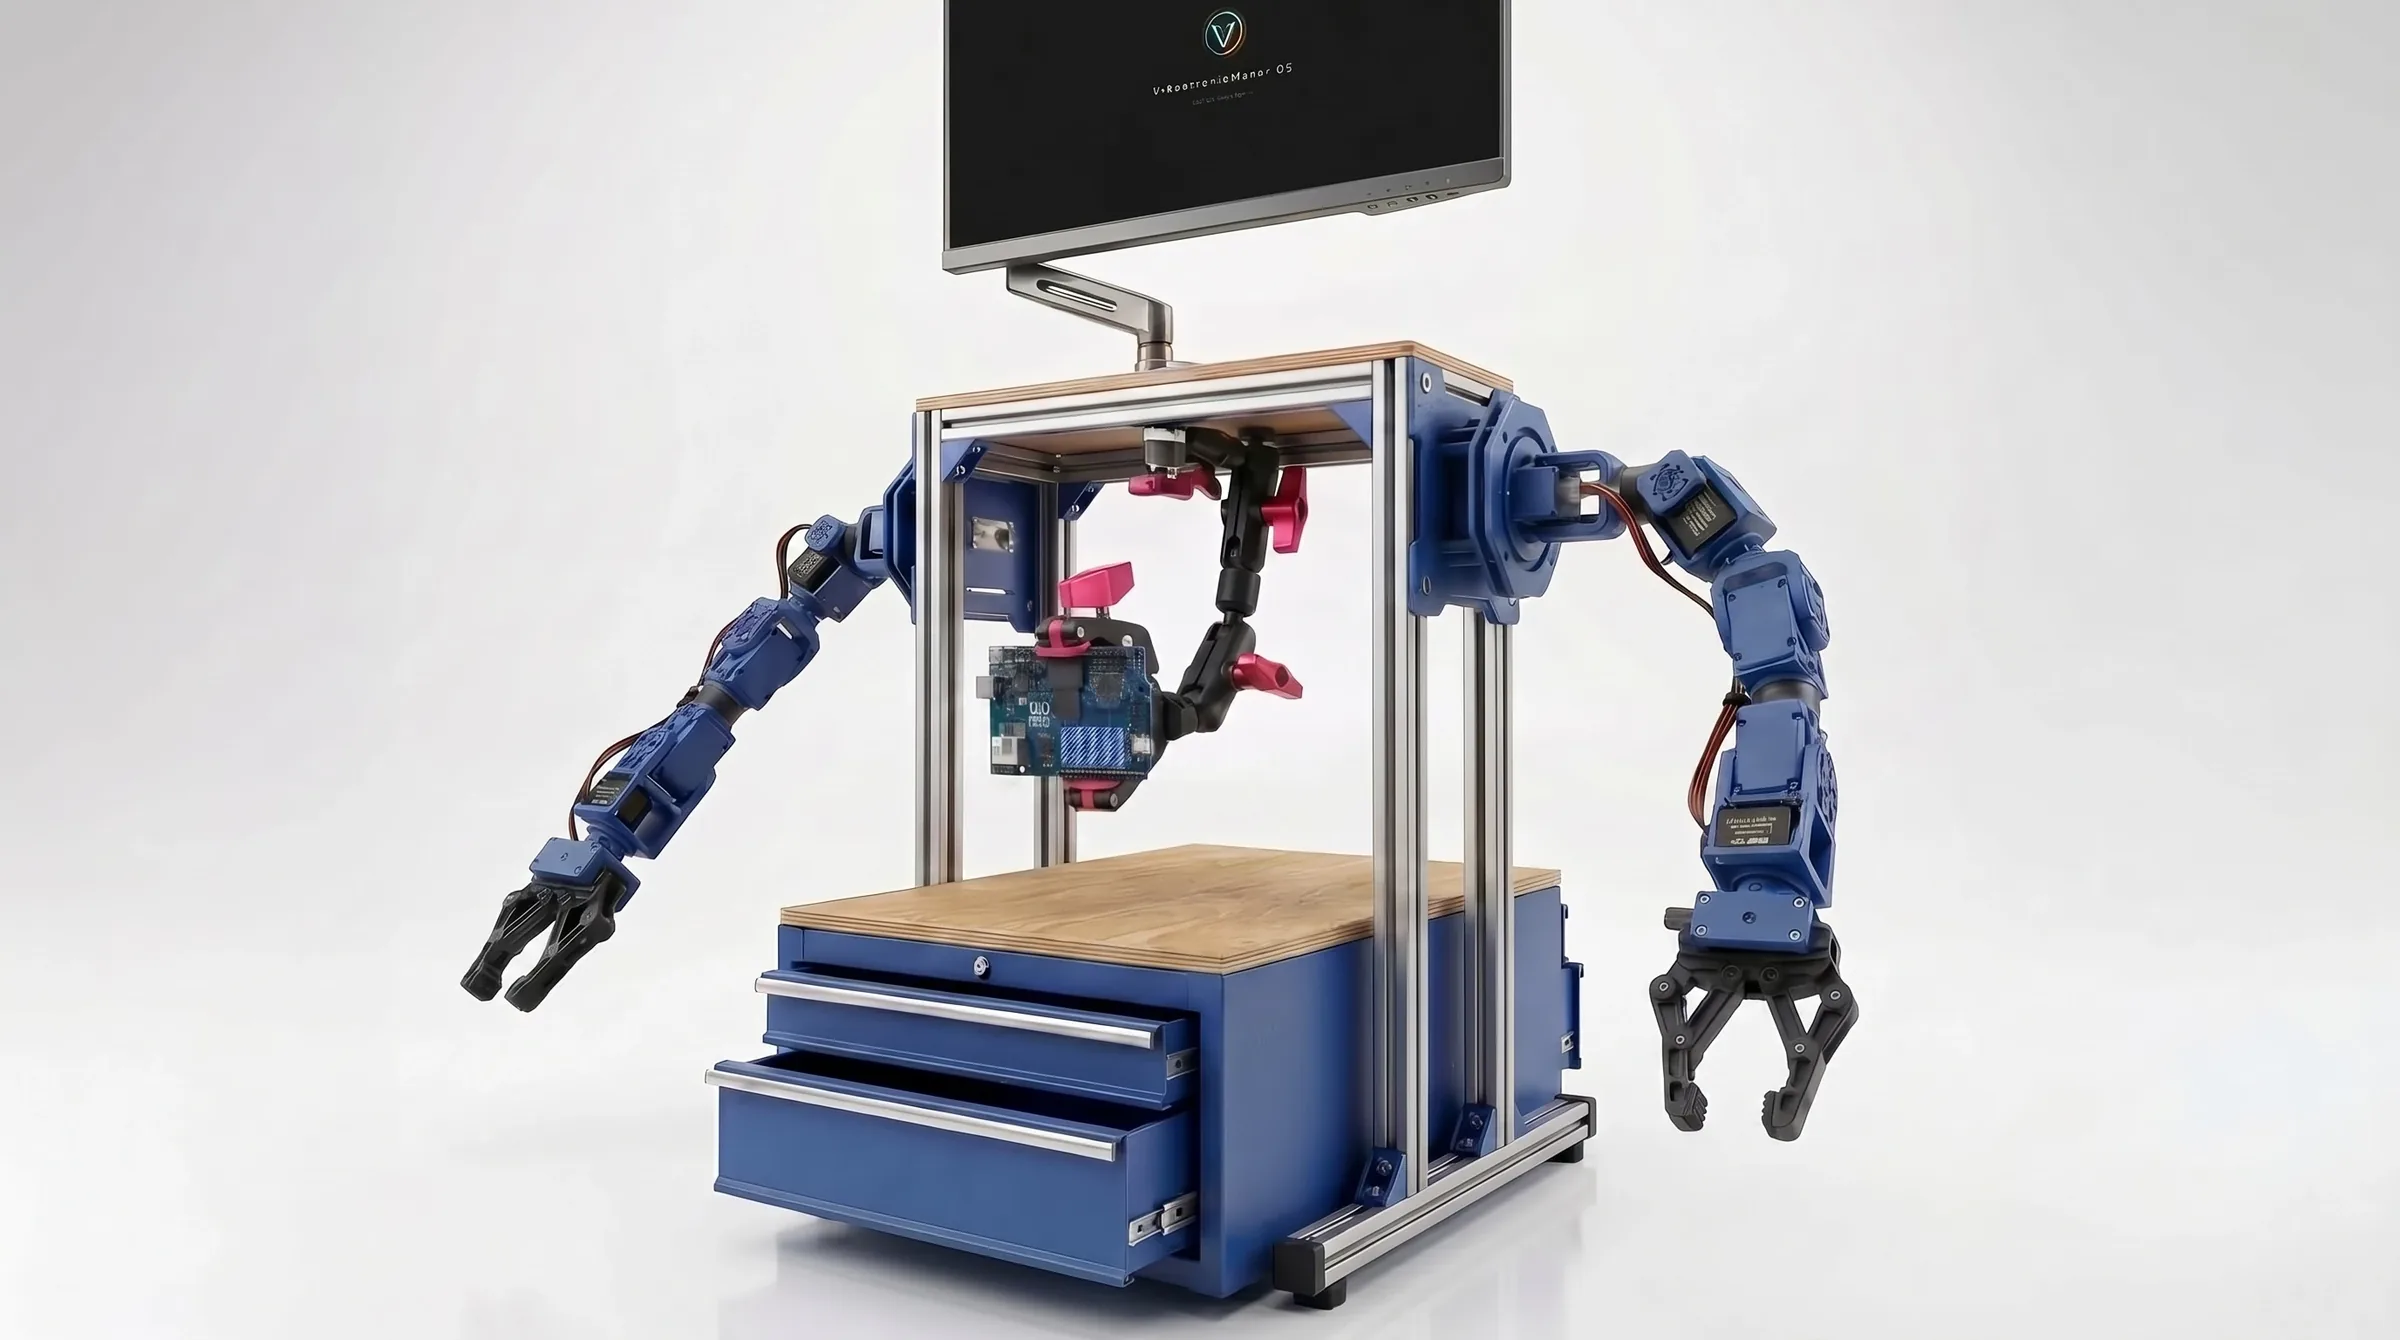
Before I bought the parts for that rig, I realized that building the full Maker Pro P³ out of aluminum extrusions and heavy actuators might cost $800 to $1,200—and that creates a real financial barrier.
When you are figuring out how to set up a physical AI lab at home, you do not need to spend $1,000. So I came up with the Entry Sentry P³, which costs under $100 to build, so I could start where any of us would start: in a low-cost prototype.
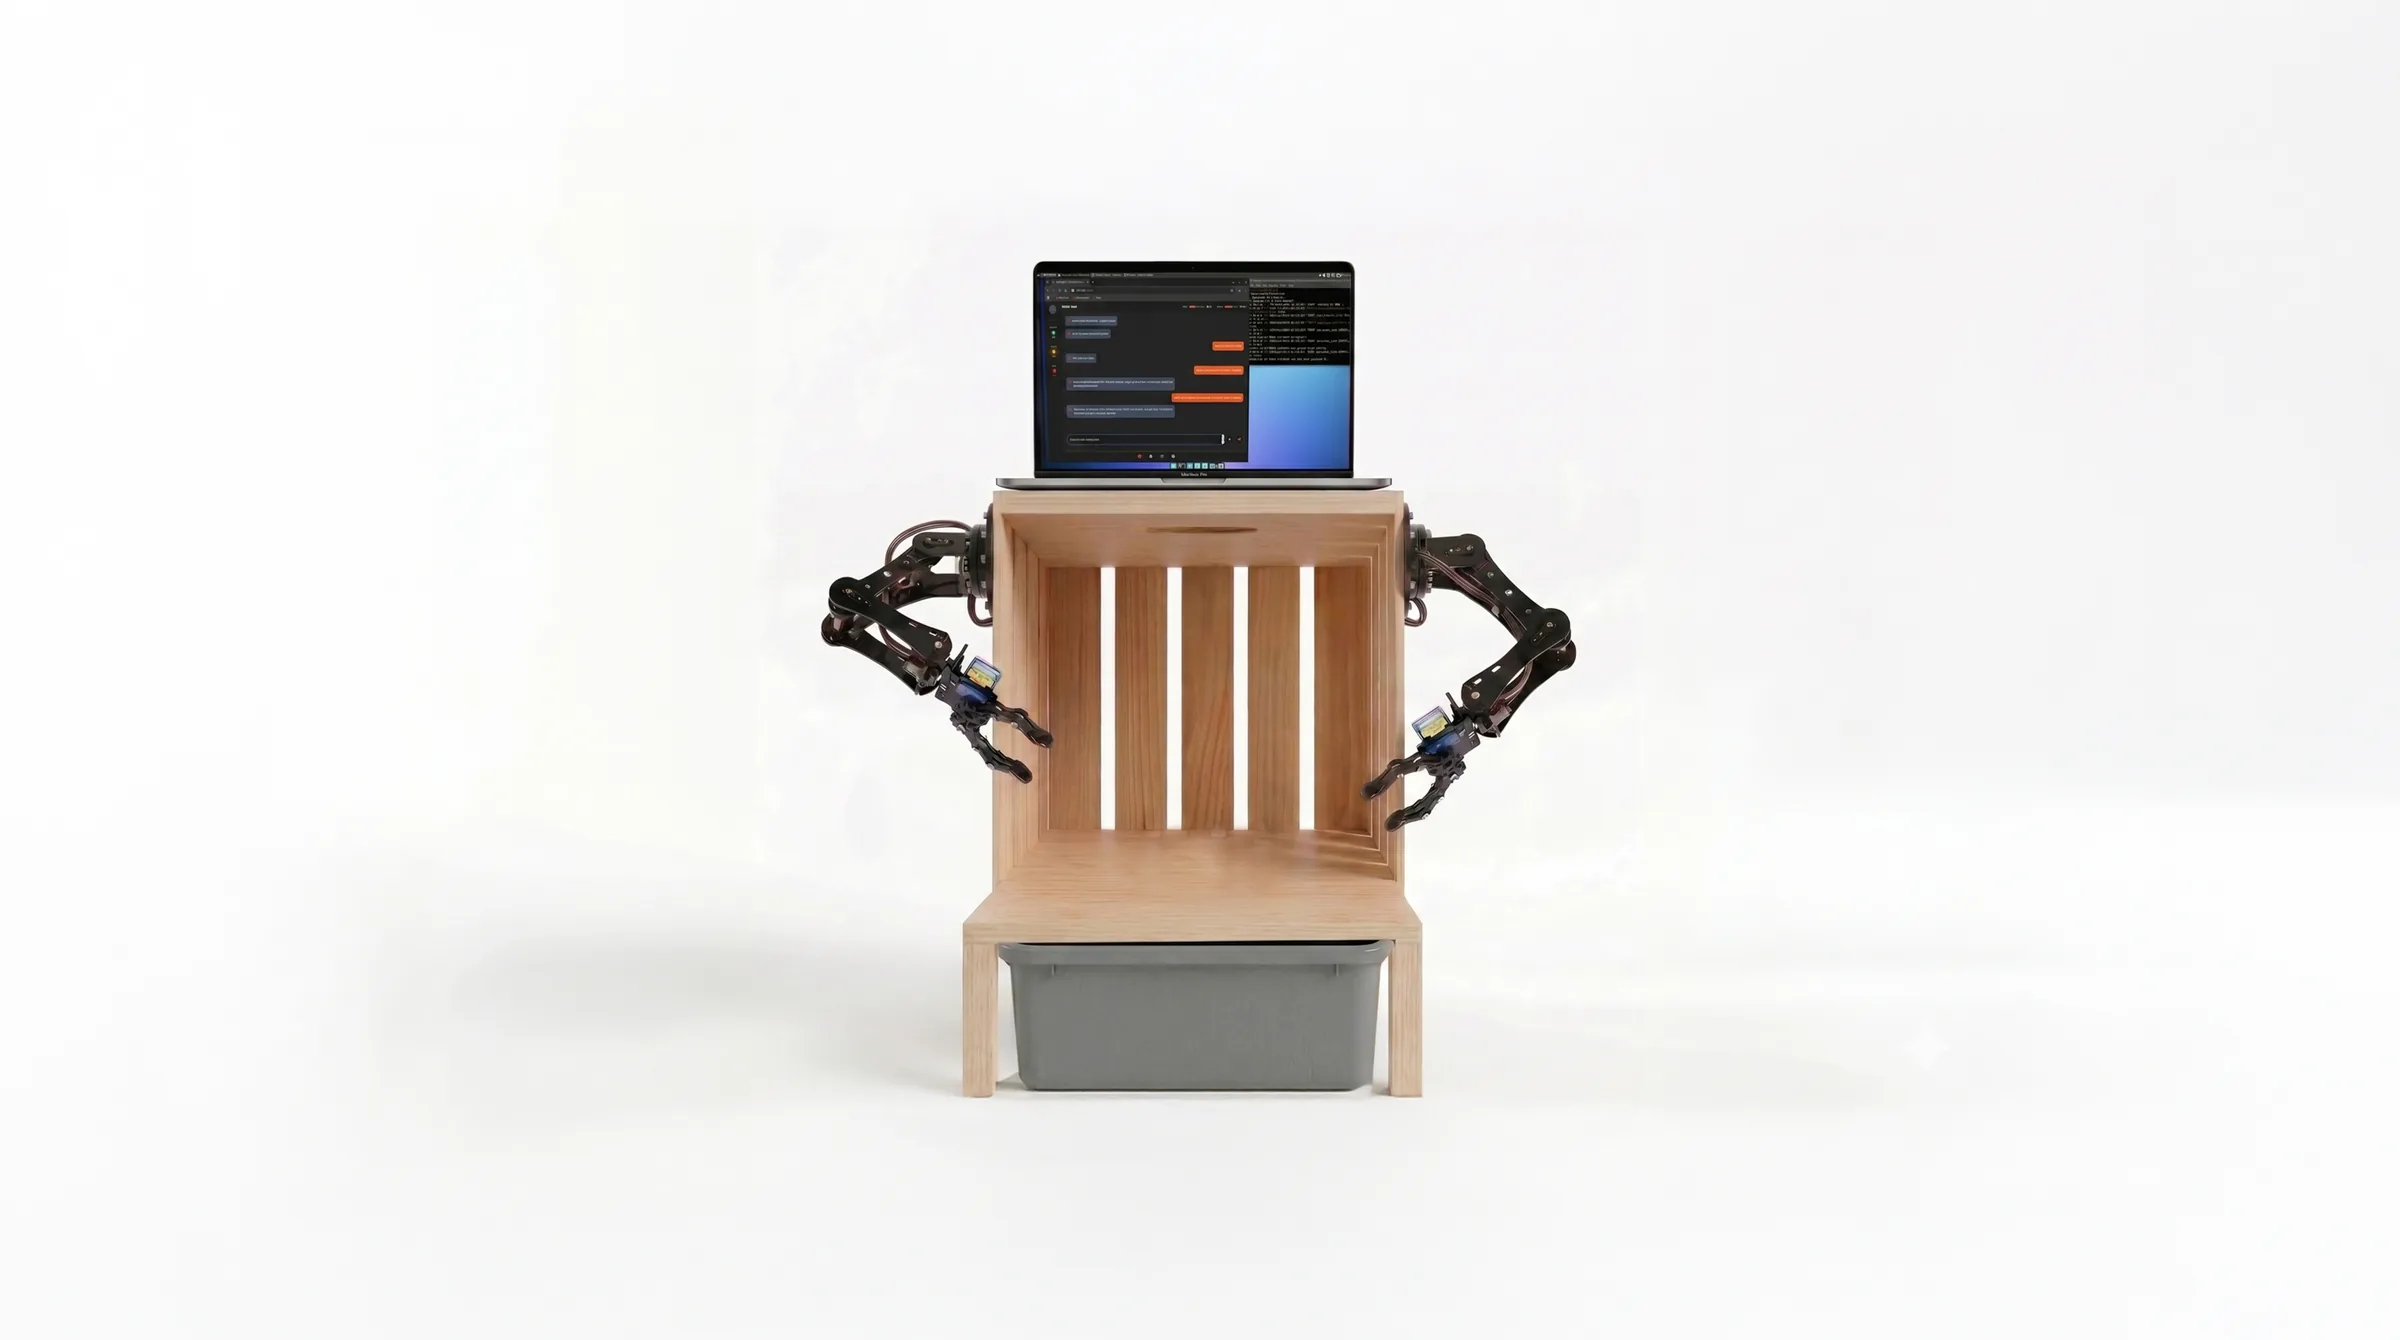
The Freedom of the Wooden Milk Crate: Attach Whatever You Want, Wherever You Want
The whole point of the Entry Sentry P³ and its wooden milk crate is freedom. When you build on a wooden crate with a basic AceBott arm kit, you are not locked into a fixed layout. You can experiment and figure out where you actually want your arm and components to go.
Will your arm be mounted on the side of the crate like in the concept image above, or mounted under the top slats hanging down? Look at how I mounted the arm on my desk below:
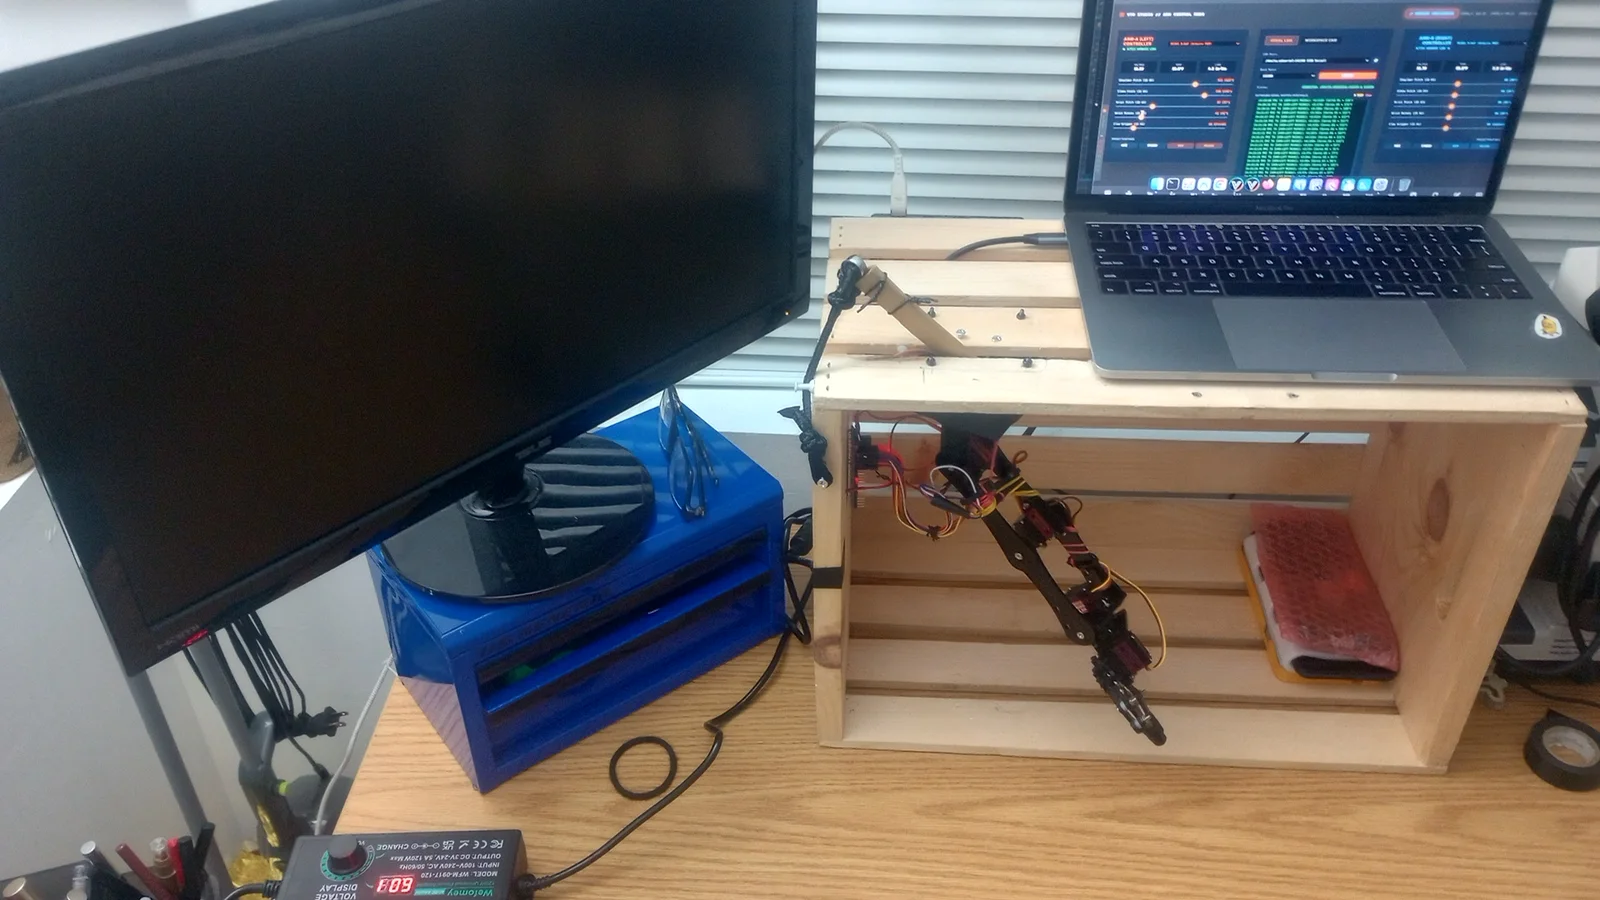
6.0 V DC power supply powering the servos.
The slatted wooden crate gives you the room and flexibility to attach whatever you want, wherever you want—moving an arm from the side wall to underneath the top deck, bolting a microcontroller board to an inside slat, or adding sensors, a camera, or a display as new ideas come up.
Once your physical computing hardware is mounted the way you like it, you add AI vision, voice, mouth animation, and Cloud or local Edge AI reasoning inside VTM Studio—turning a simple wooden crate into a physical AI workstation.
Build Whatever You Want in One Place and Keep Building It Up
That is what VTM Studio is designed for: physical computing software and physical AI software in one application—software that combines physical AI and physical computing in one place, and software that combines Arduino IDE, circuit layout, and AI vision so you can build whatever you want and keep building it up at your own pace.
You can start on day one by wiring a single sensor or LoRa module, drawing your 2D circuit layout in Layout Mode, checking pinouts in Spec Mode, testing voltage and continuity with 2-wire probes in Meter Mode, or flashing a C++ sketch in Code Mode to watch live gauges in Science Mode.
Then, without switching to a different program, you can attach an arm in Arm Control Mode, turn on camera tracking in Vision Mode, talk to ARC and VAS-X with click-to-talk voice input, spoken audio readback, and animated mouth feedback, or quantize and run your own local .gguf models in Model Forge Mode. Whether your project lives on a breadboard, inside a wooden milk crate as an Entry Sentry P³, or grows into other physical AI examples like the Maker Pro P³, Chef P³, or Fitness P³, you can keep adding to it in one workspace.
Frequently Asked Questions
What is physical AI for makers, and how does it relate to physical computing?
Physical AI sits right inside physical computing. Since AI is part of computing, physical AI for makers is physical computing with AI in the loop—starting with a microcontroller, sensors, or servo motors and adding AI vision, voice input, spoken audio readback, mouth animation, and Cloud or local Edge AI models.
Is there all-in-one physical computing software that combines Arduino IDE, circuit layout, and AI vision?
Yes. VTM Studio is physical computing software and physical AI software in one application—combining C++ code editing and USB board flashing (Code Mode), 2D breadboard and circuit wiring diagrams (Layout Mode and Spec Mode), live serial gauges (Science Mode), 2-wire low-voltage multimeter probing (Meter Mode), multi-axis servo control (Arm Control Mode), camera tracking (Vision Mode), click-to-talk Whisper voice input, Piper spoken audio readback, and local .gguf model quantization (Model Forge Mode).
How do you set up a physical AI lab at home for under $100?
Instead of spending $800 to $1,200 on an aluminum-frame rig right away, you can start with a low-cost prototype like the Entry Sentry P³ for under $100—using a slatted wooden milk crate as the frame, a basic AceBott MG90S servo arm kit mounted on the side or under the top slats, a separate 6.0 V DC servo power supply, and the laptop you may already own resting on top running VTM Studio.
Does VTM Studio work with the boards, sensors, servos, and cameras I may already own?
Yes. VTM Studio runs on macOS, Windows, Linux, Raspberry Pi 4B, and the Arduino UNO Q, and works with the Arduino, ESP32, STM32, and RP2040 boards, sensors, servo kits, and USB webcams you may already own.